Scaling the Cluster
One of the major benefits of OpenShift on OpenShift with hosted control planes is how easy it is for the cluster node pools to scale dynamically. As resources are consumed in the hosted cluster, the hosting cluster responds to autoscale requests from the cluster to meet the application needs. In this section we will demonstrate this feature.
Goals
-
Deploy an application to the cluster.
-
Scale up the application so that it consumes additional resources.
-
Observe the cluster autoscale feature.
-
Scale the cluster back to two nodes when complete.
Deploy an Application to your Hosted Cluster
-
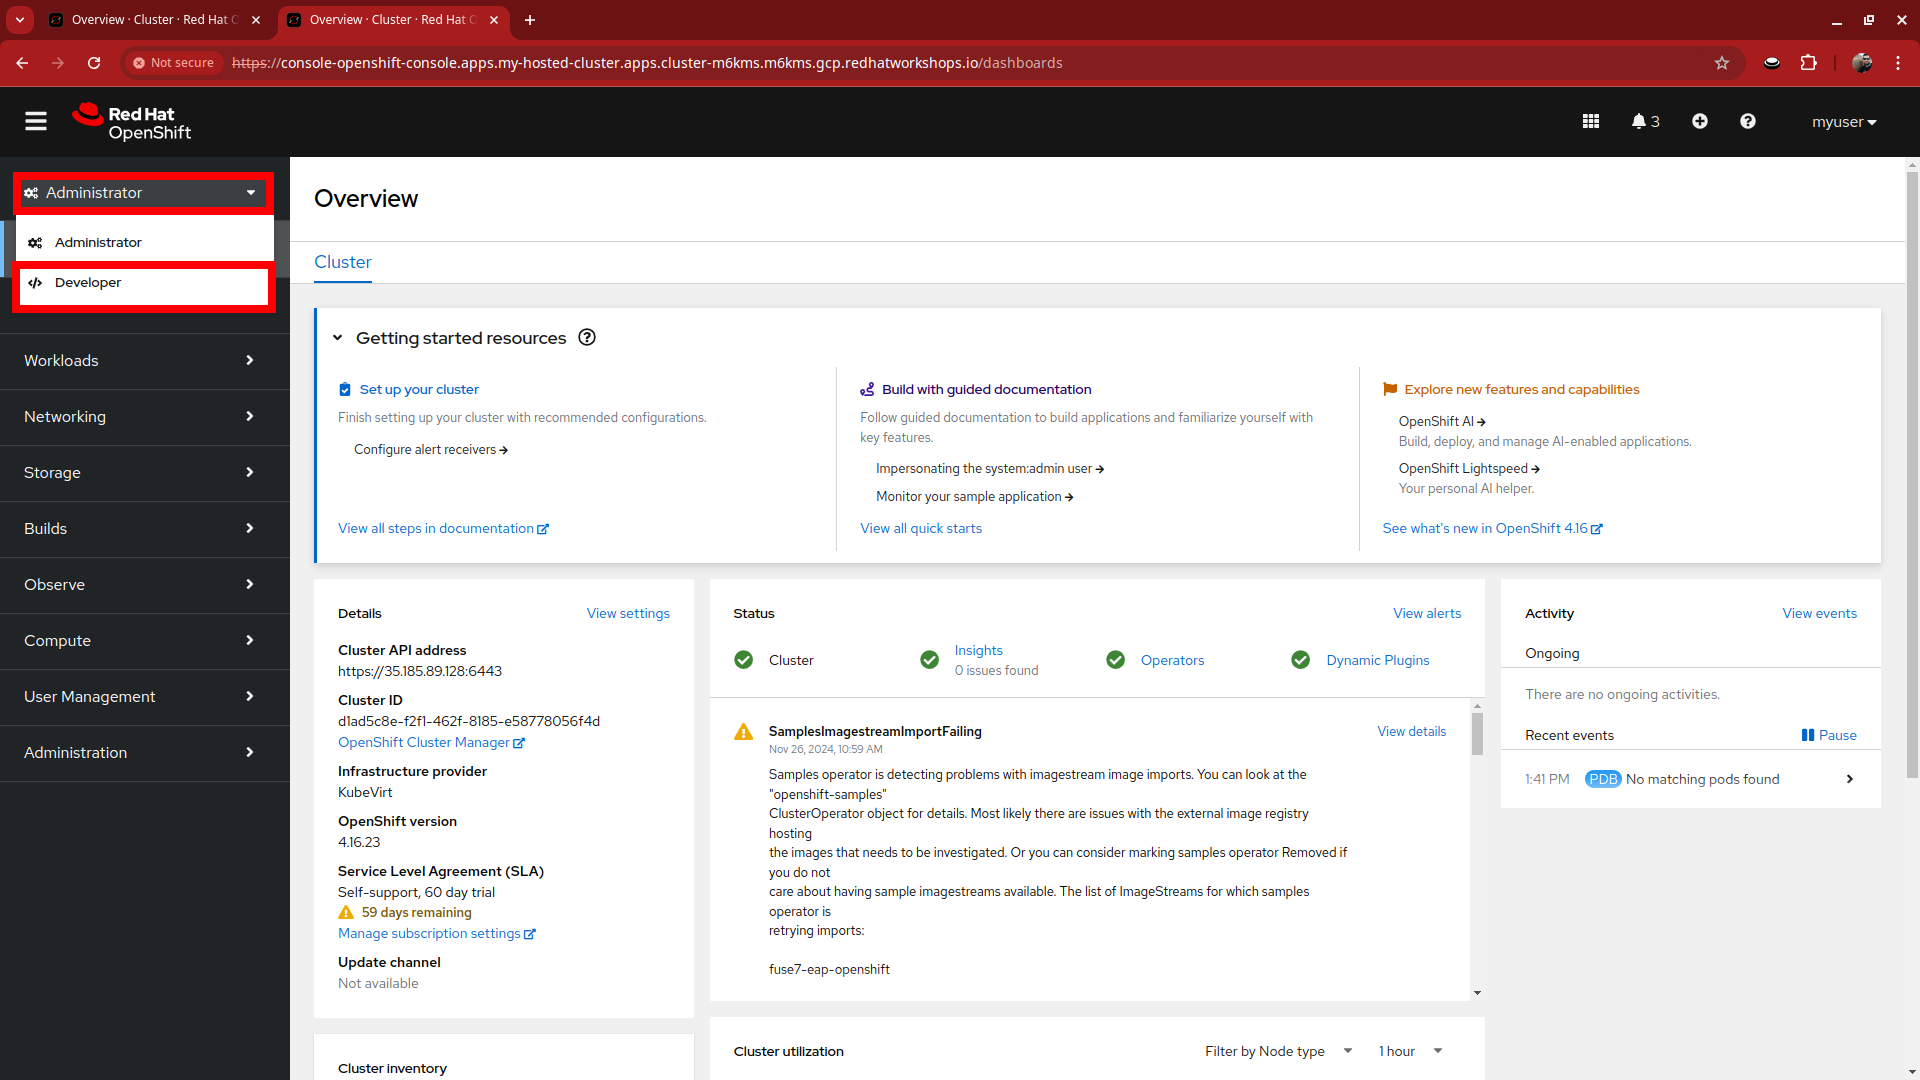
Starting where we left off on the Admin Console of our my-hosted-cluster deployment, click on Administrator on the left-side menu, and select Developer from the drop-down menu.
-
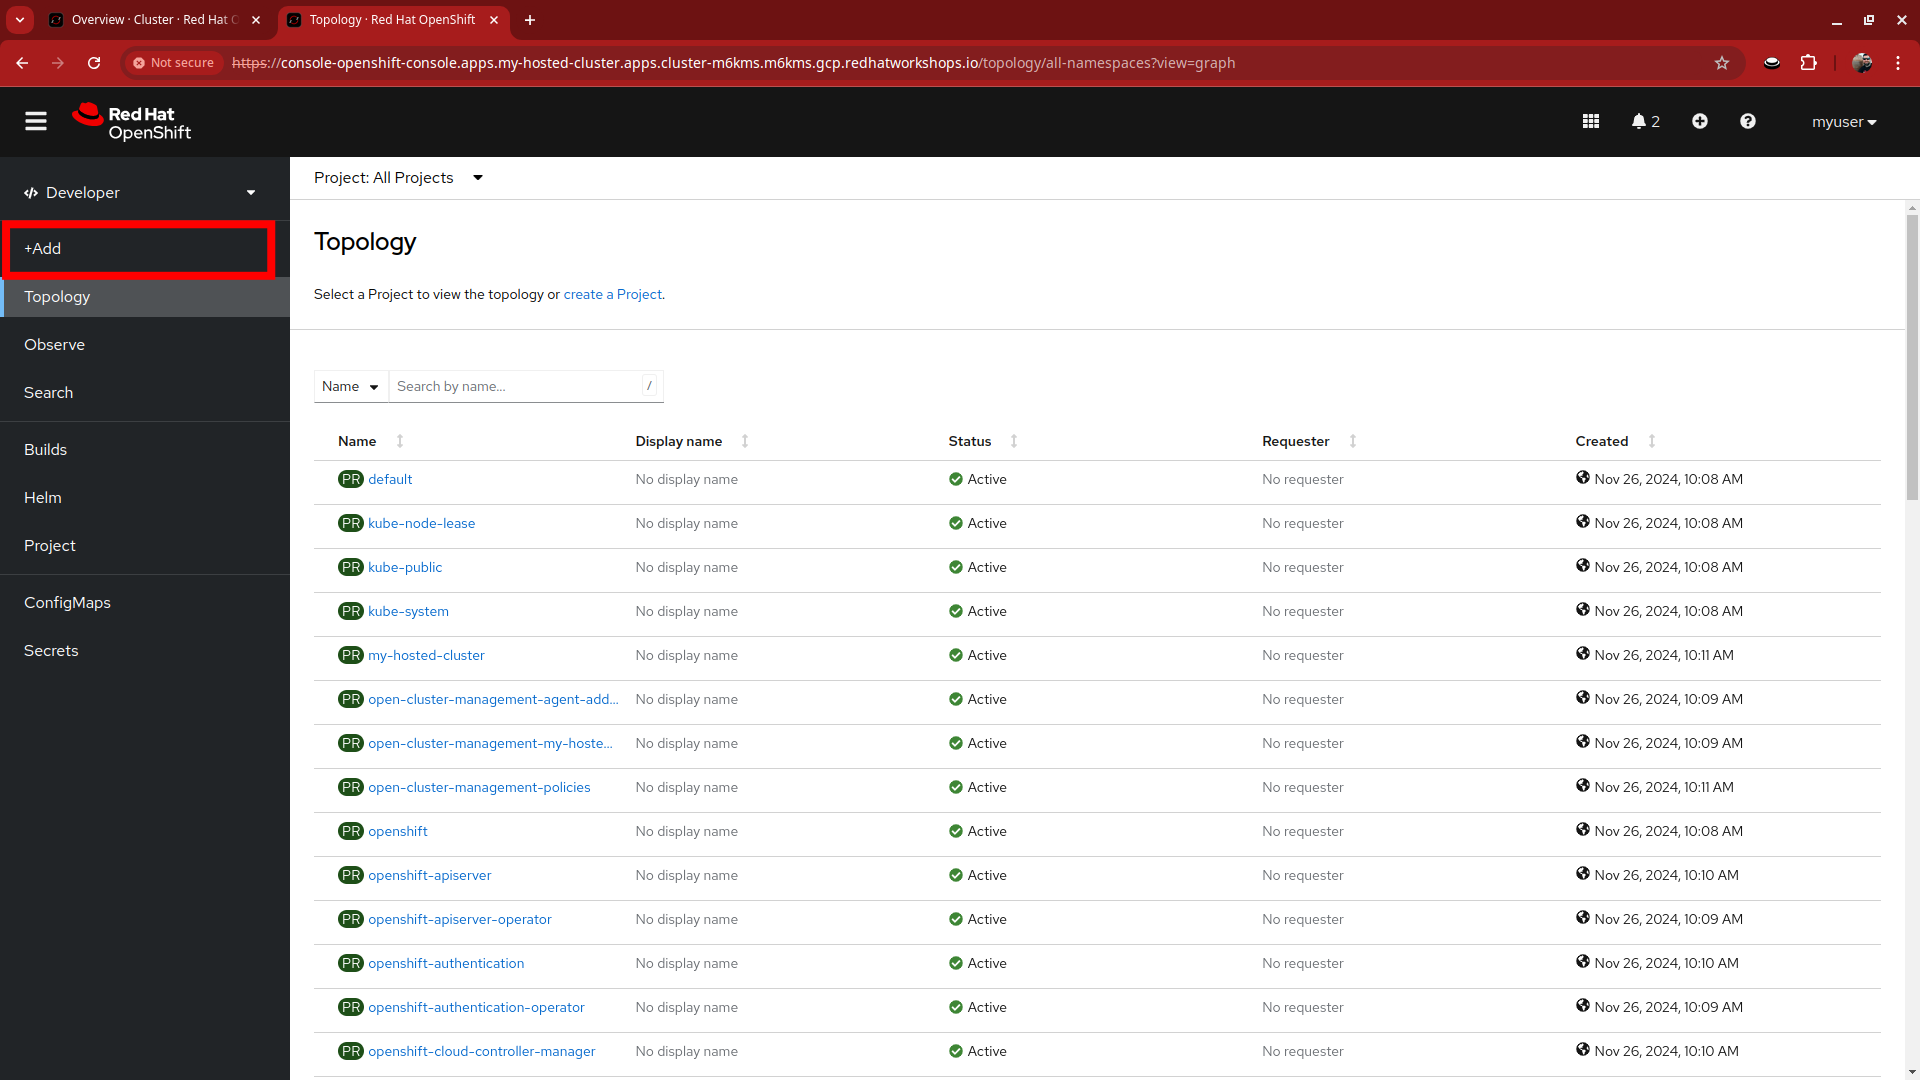
We are presented with the Topology screen which shows a list of the projects in the cluster. To create an application, click on +Add on the left-side menu.
-
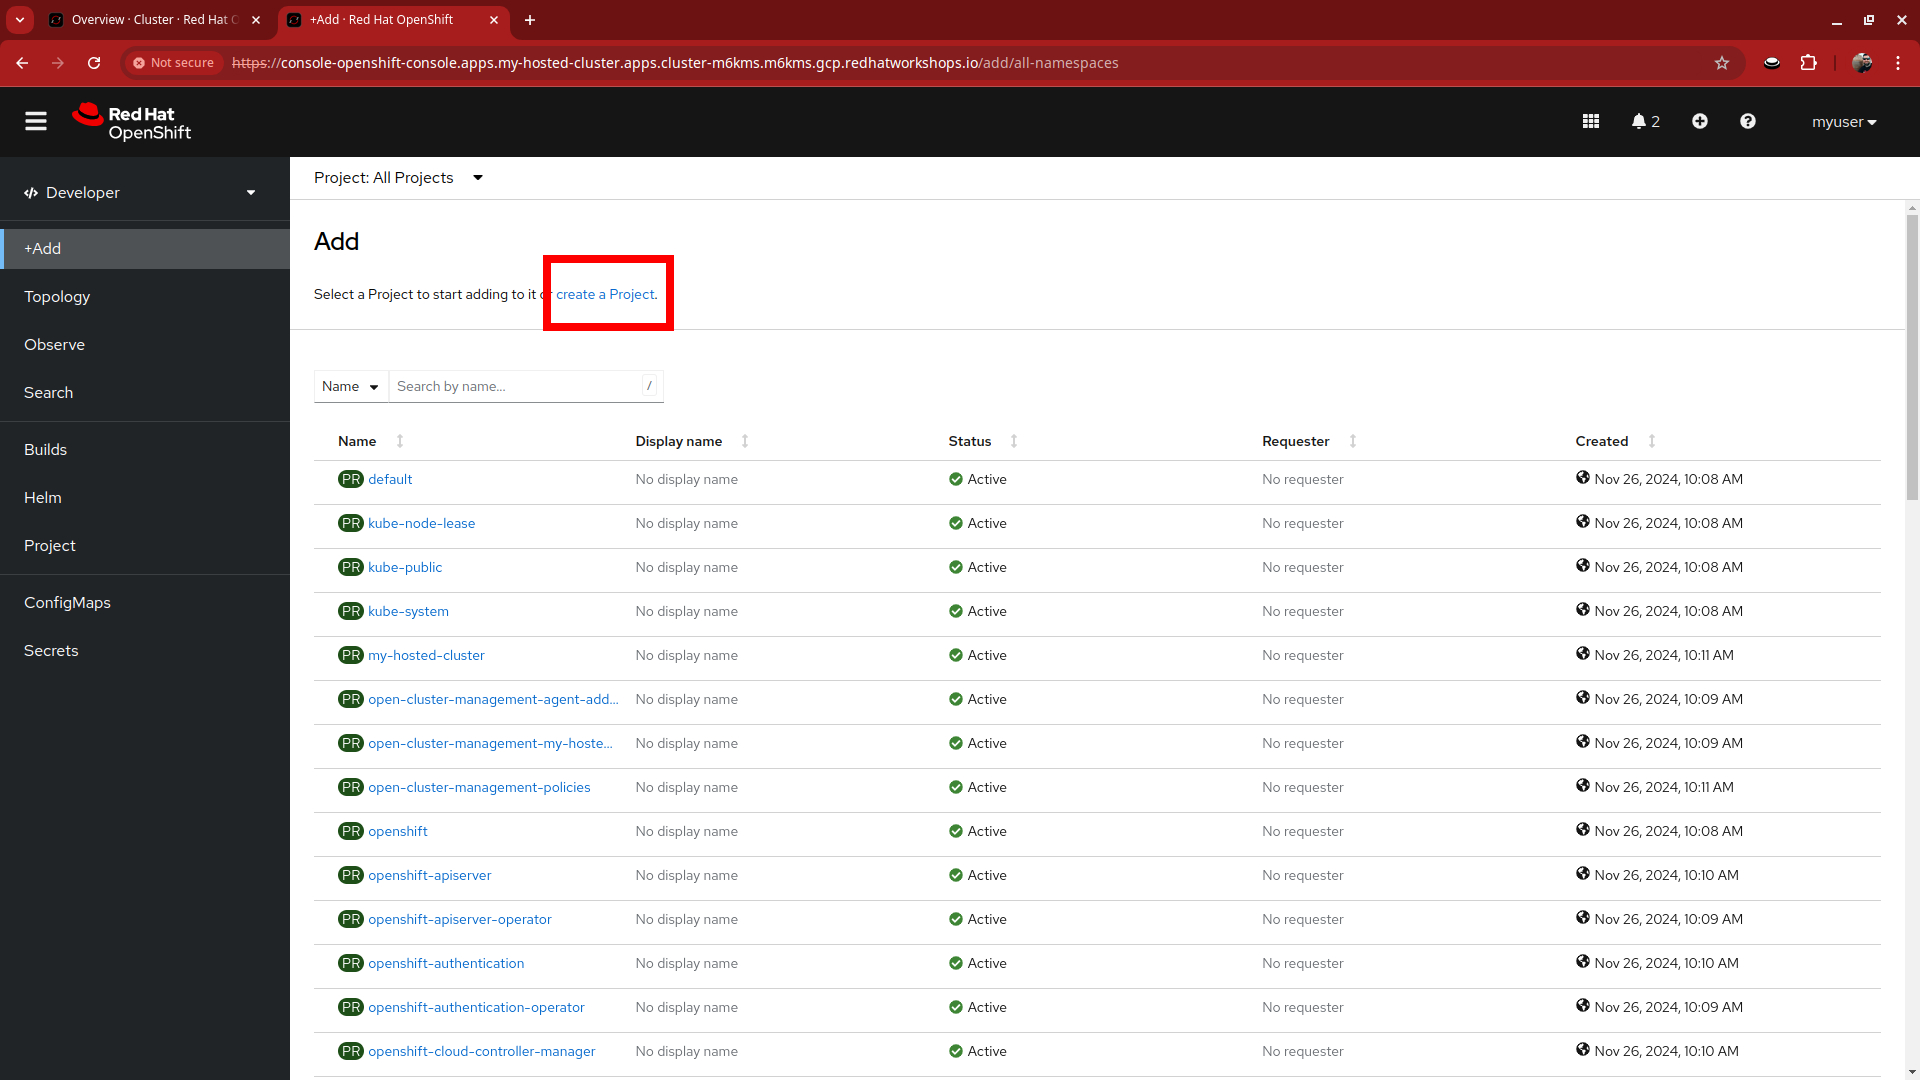
The Add screen looks very similar to the Toplogy screen, but we want to select the link to create a Project near the top of the page.
-
When the Create-Project window appears, name your project: apache-webserver, then click the Create button.
-
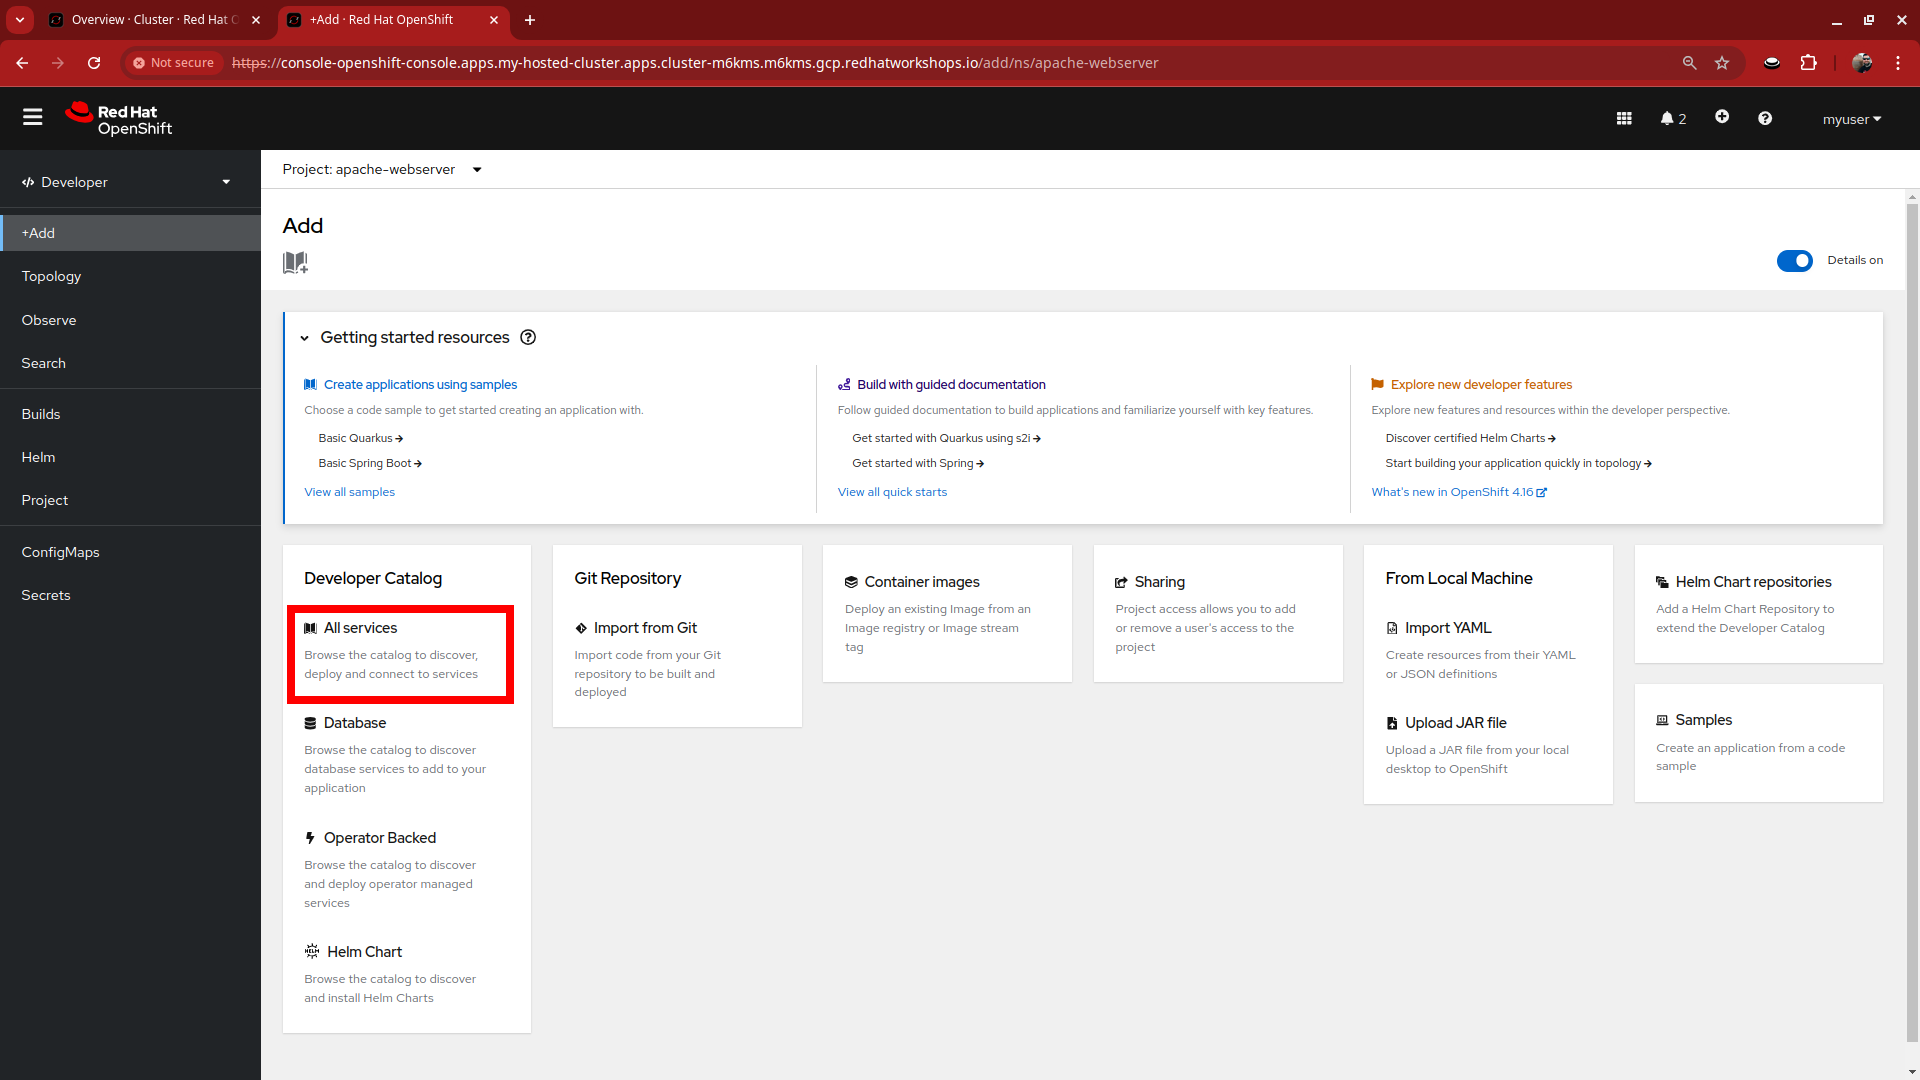
When your project is created you will enter it and see a number of ways you can deploy an application. For our simple example lets click on All services under the Developer Catalog.
-
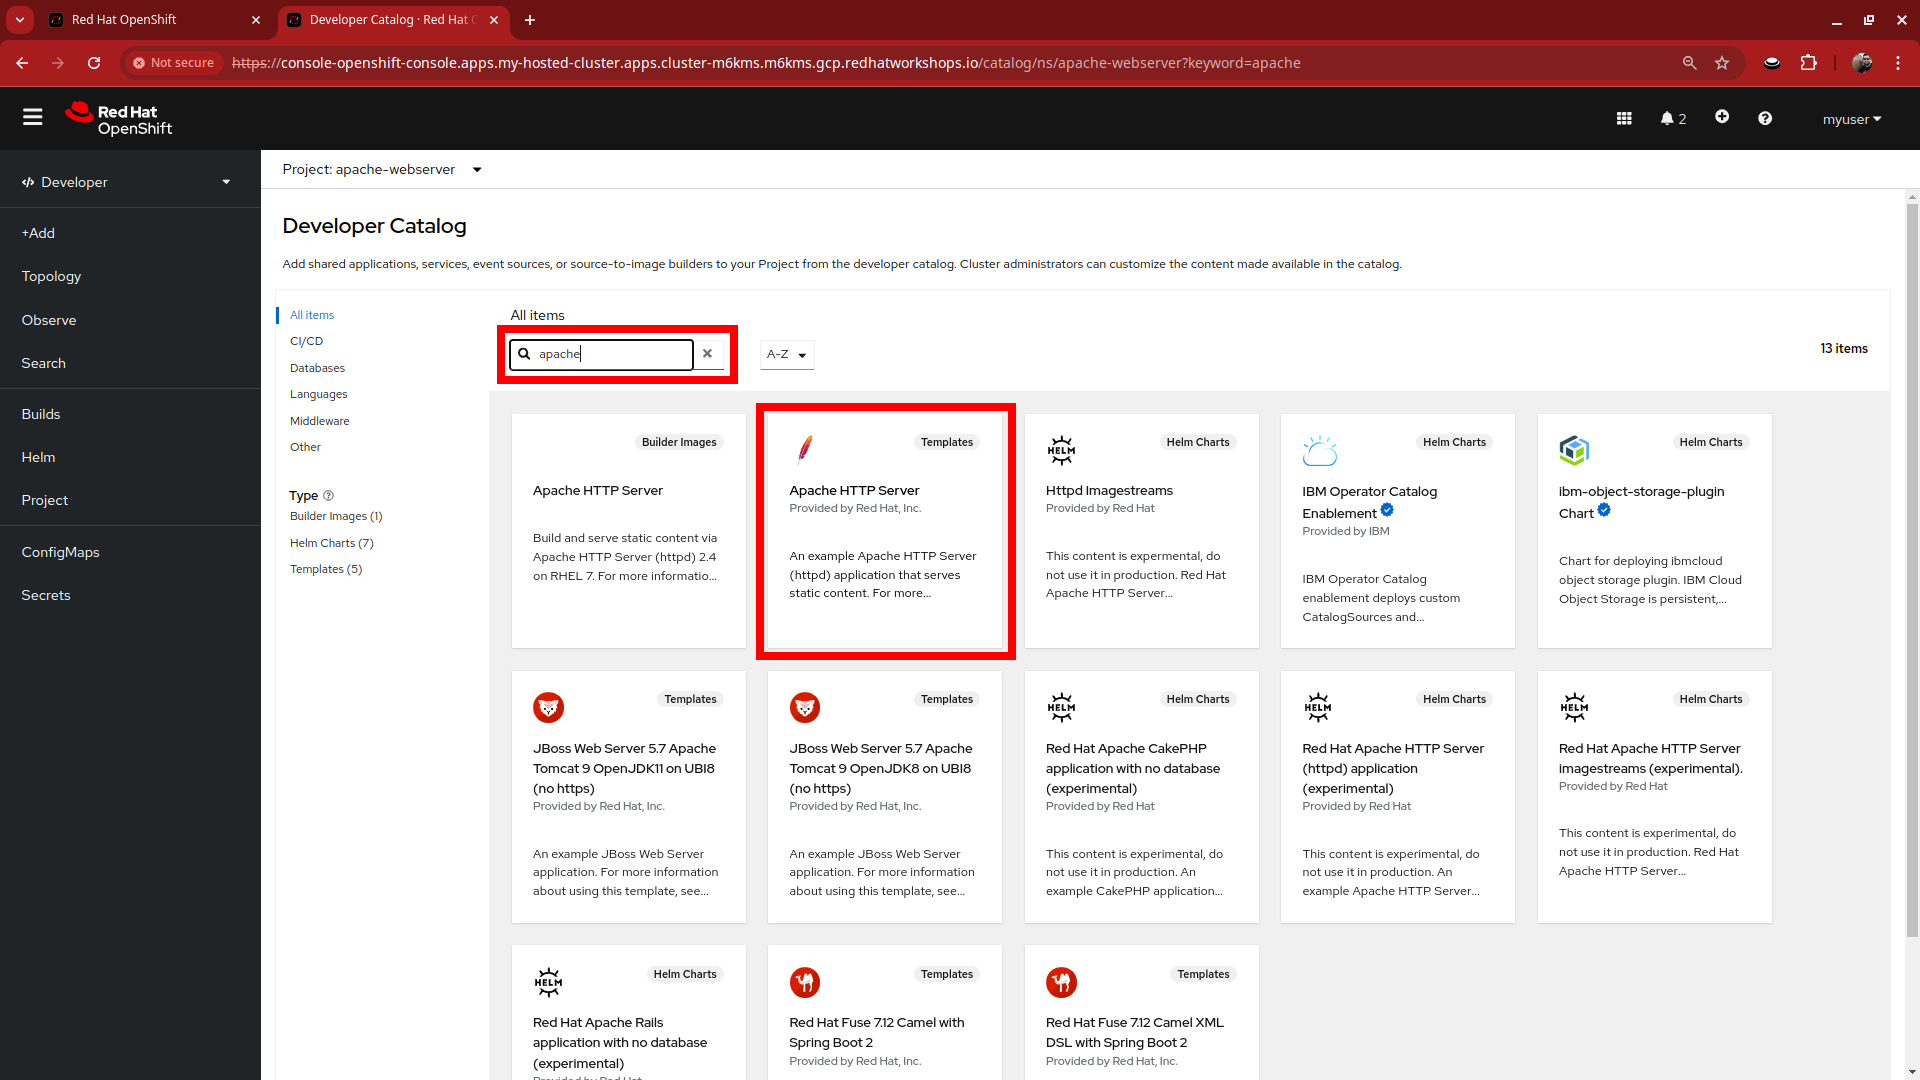
In the Developer Catalog use the search bar to search for the term apache and select the Apache HTTP Server template that appears.
-
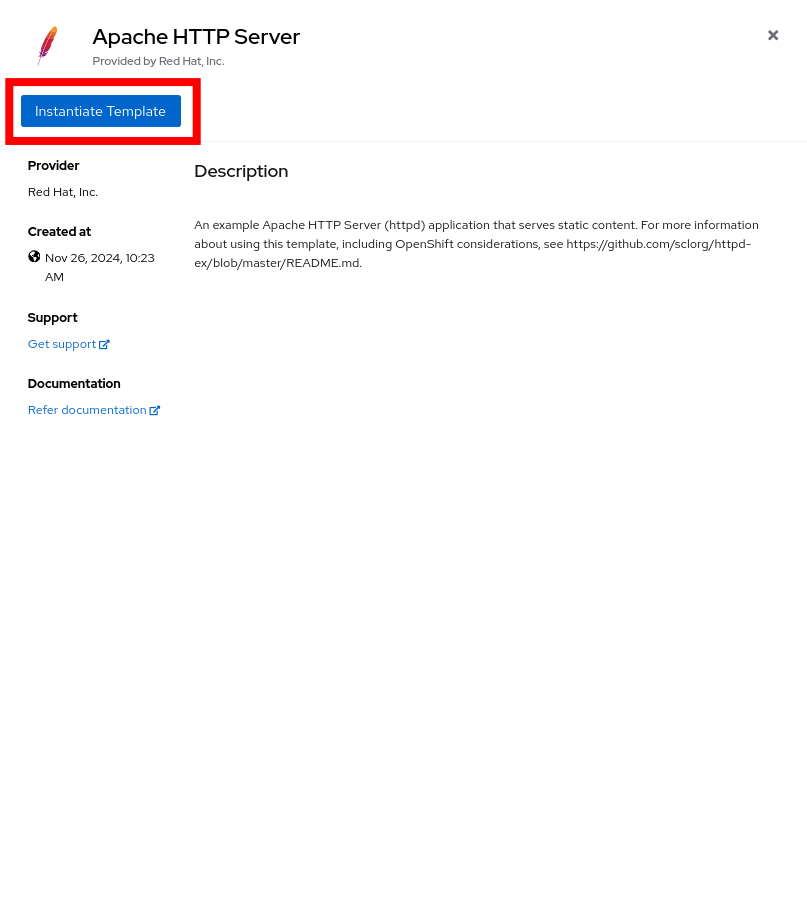
After clicking on the template you will recieve a window describing the template with a blue button named Instantiate Template. Click the button.
-
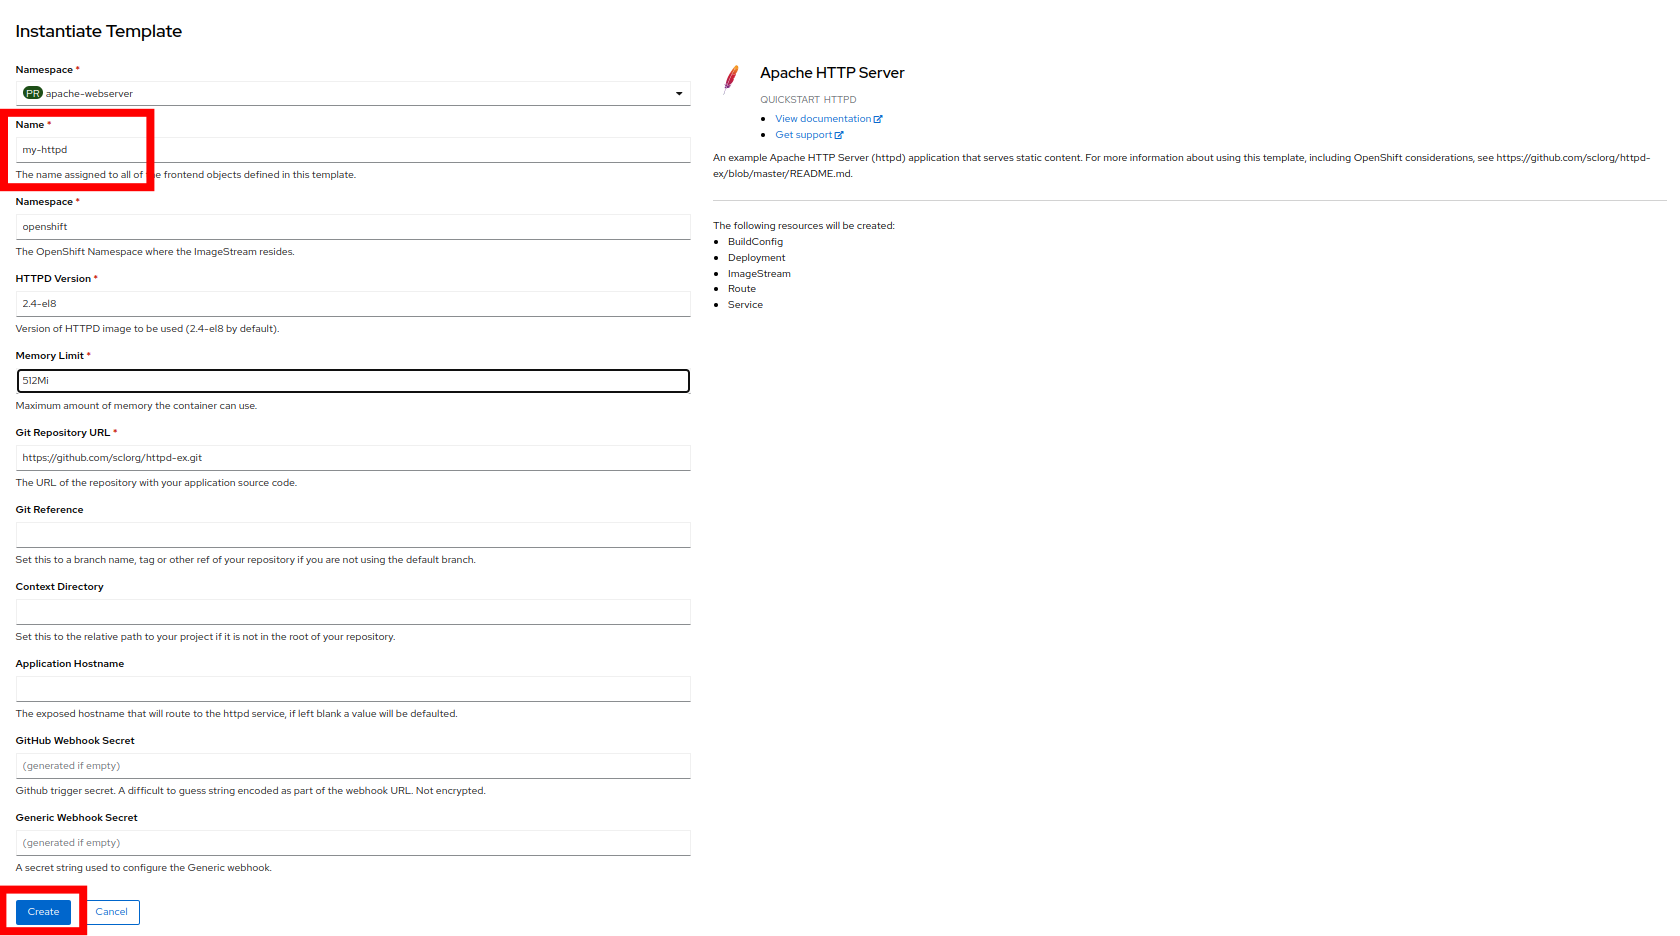
On the wizard that pops up, set the Name of the application to my-httpd and click on the blue Create button at the bottom of the page.
-
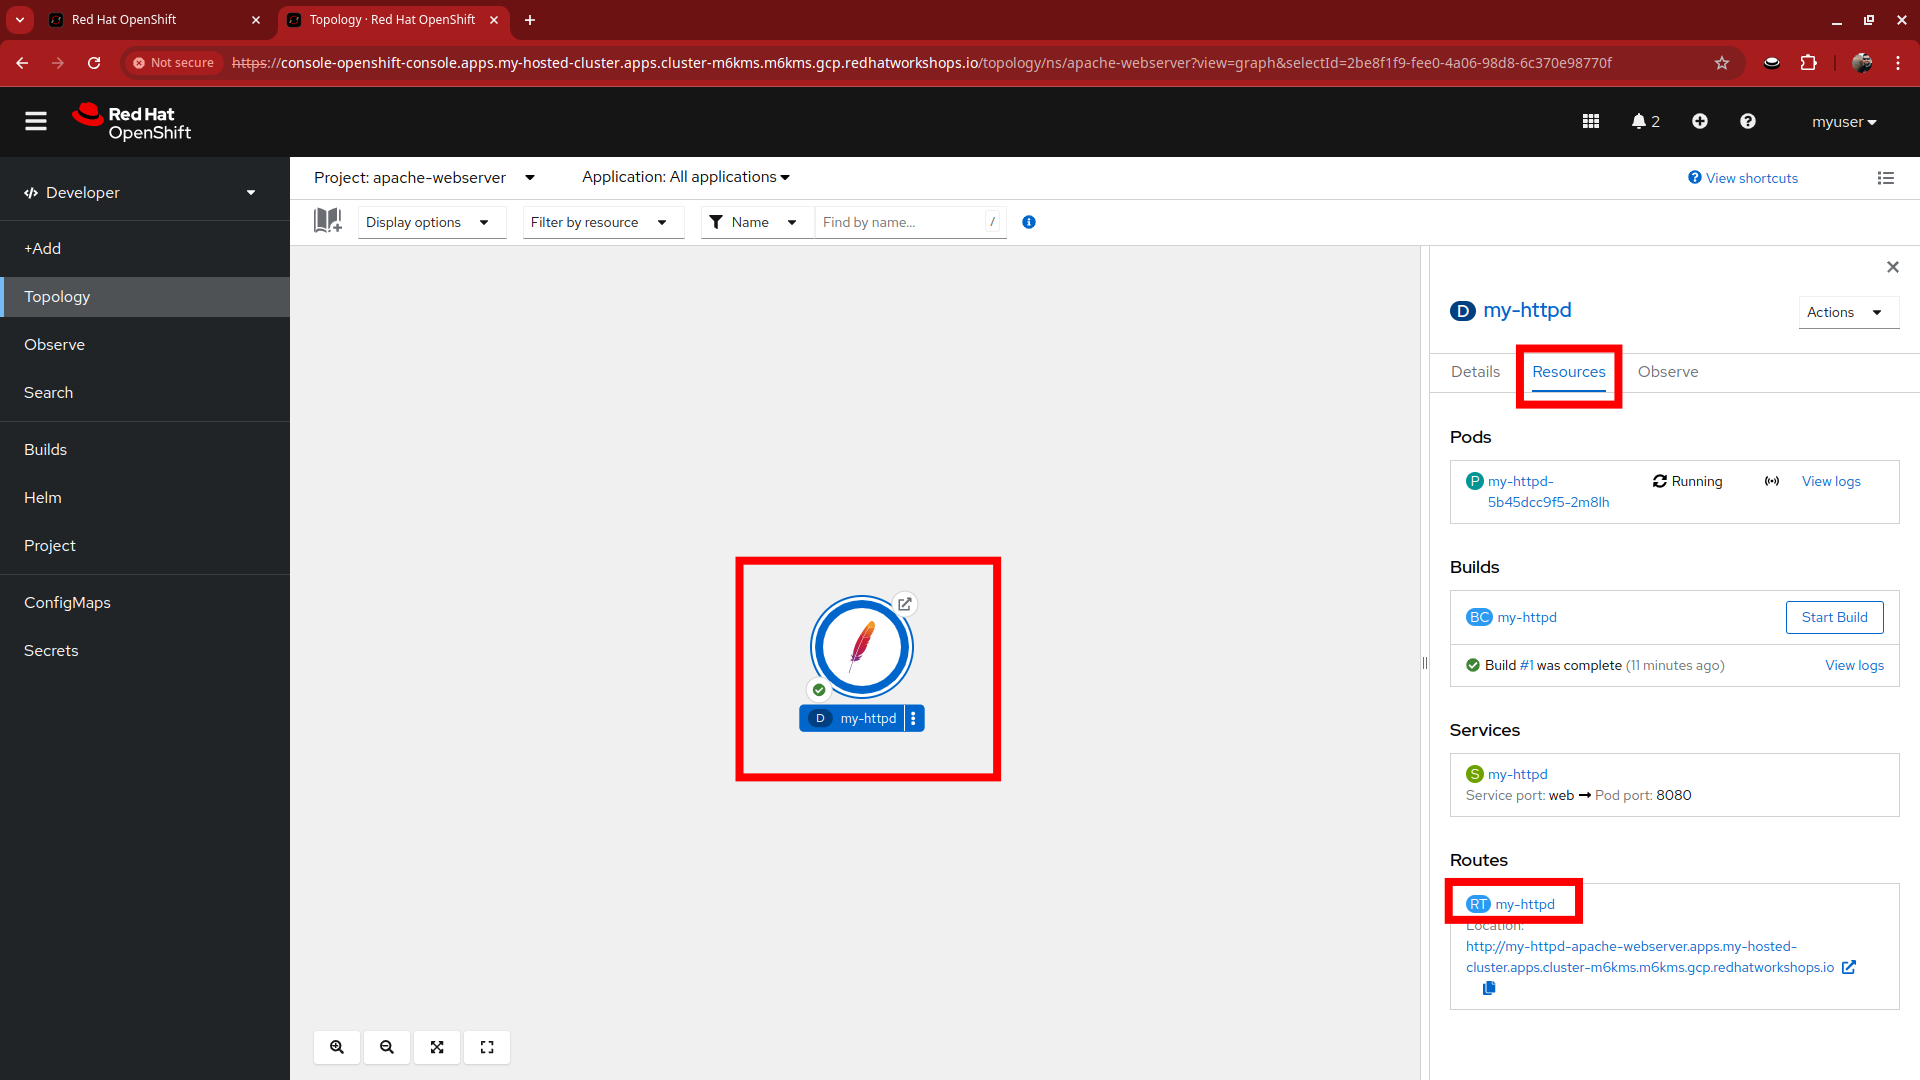
The pod will begin to build and you will see an instance of my-httpd in the center of the page. Click on it to see information about the application as it builds. When complete, click on Resources and then the my-httpd route object listed at the bottom.
-
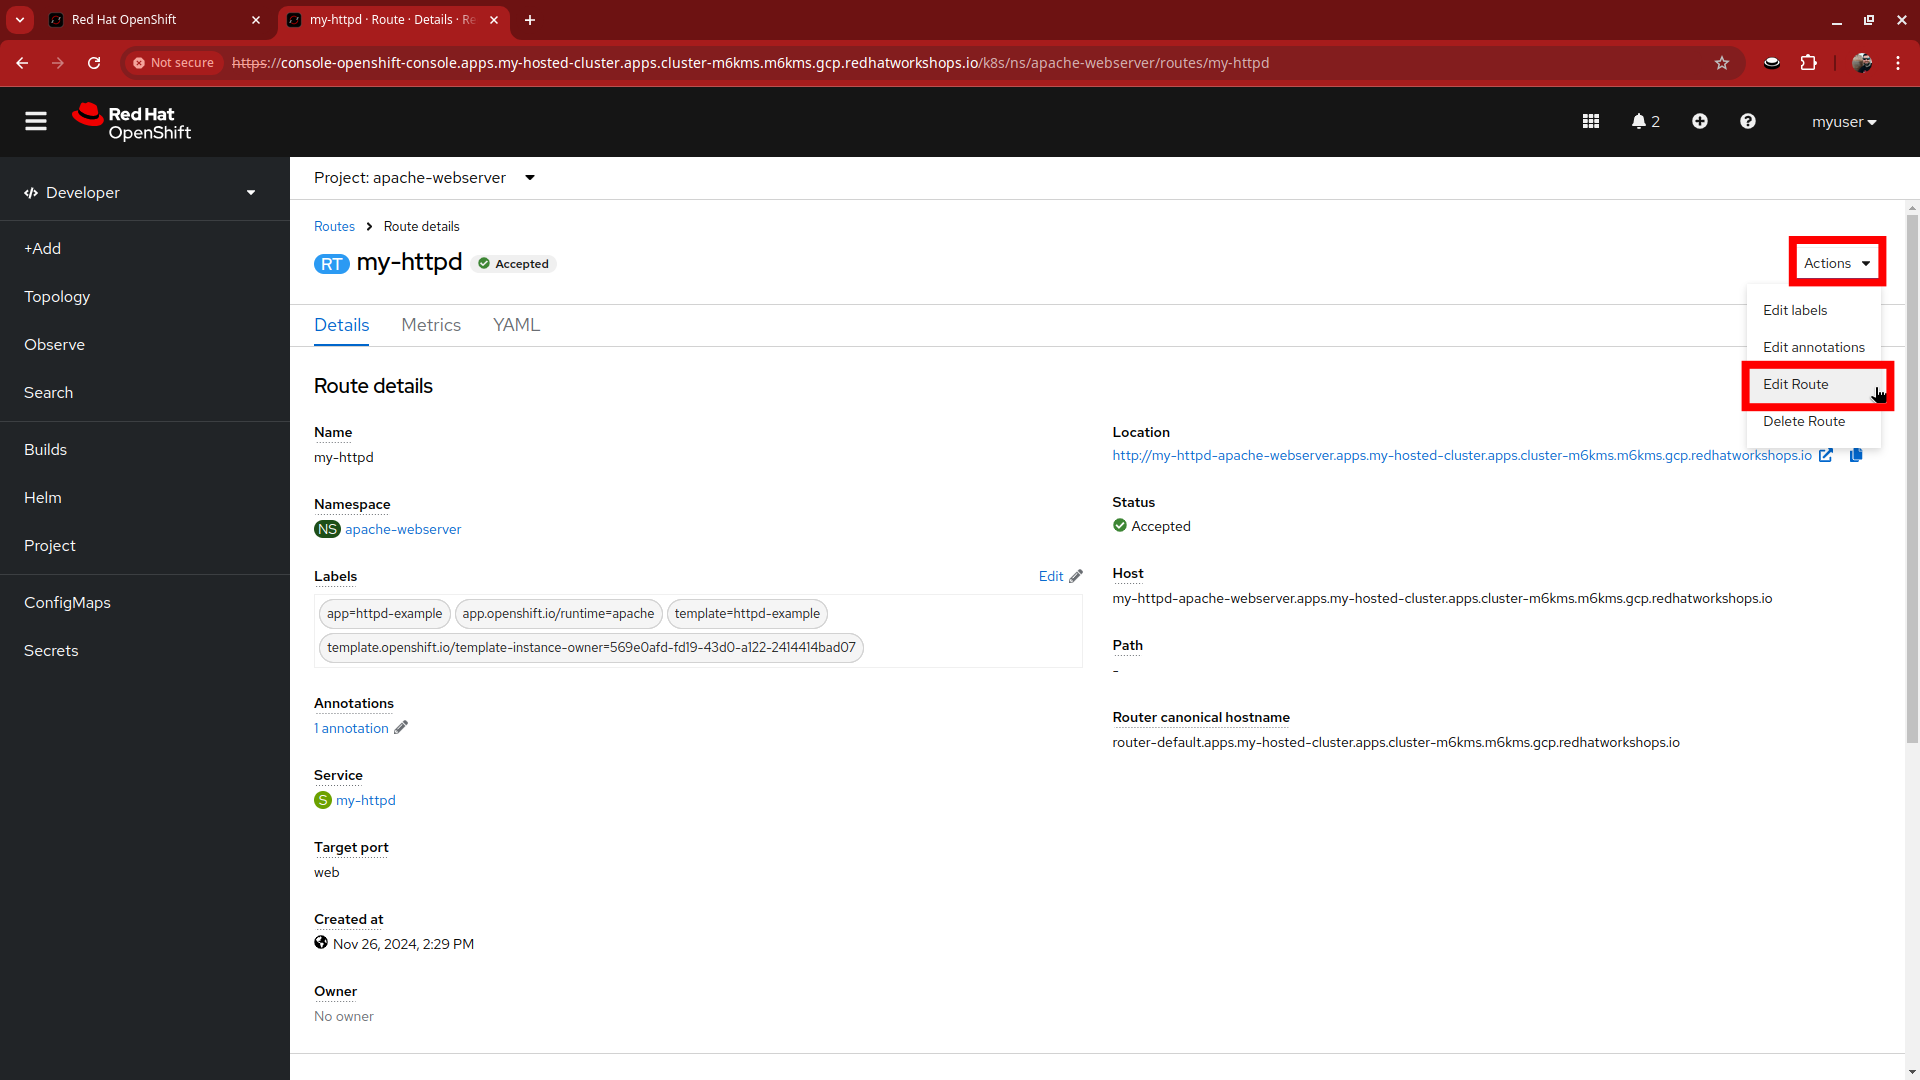
You will be taken to the Route details page where we can confirm the route settings are as expected. Click the Actions menu in the upper right corner and select Edit Route from the drop down menu.
-
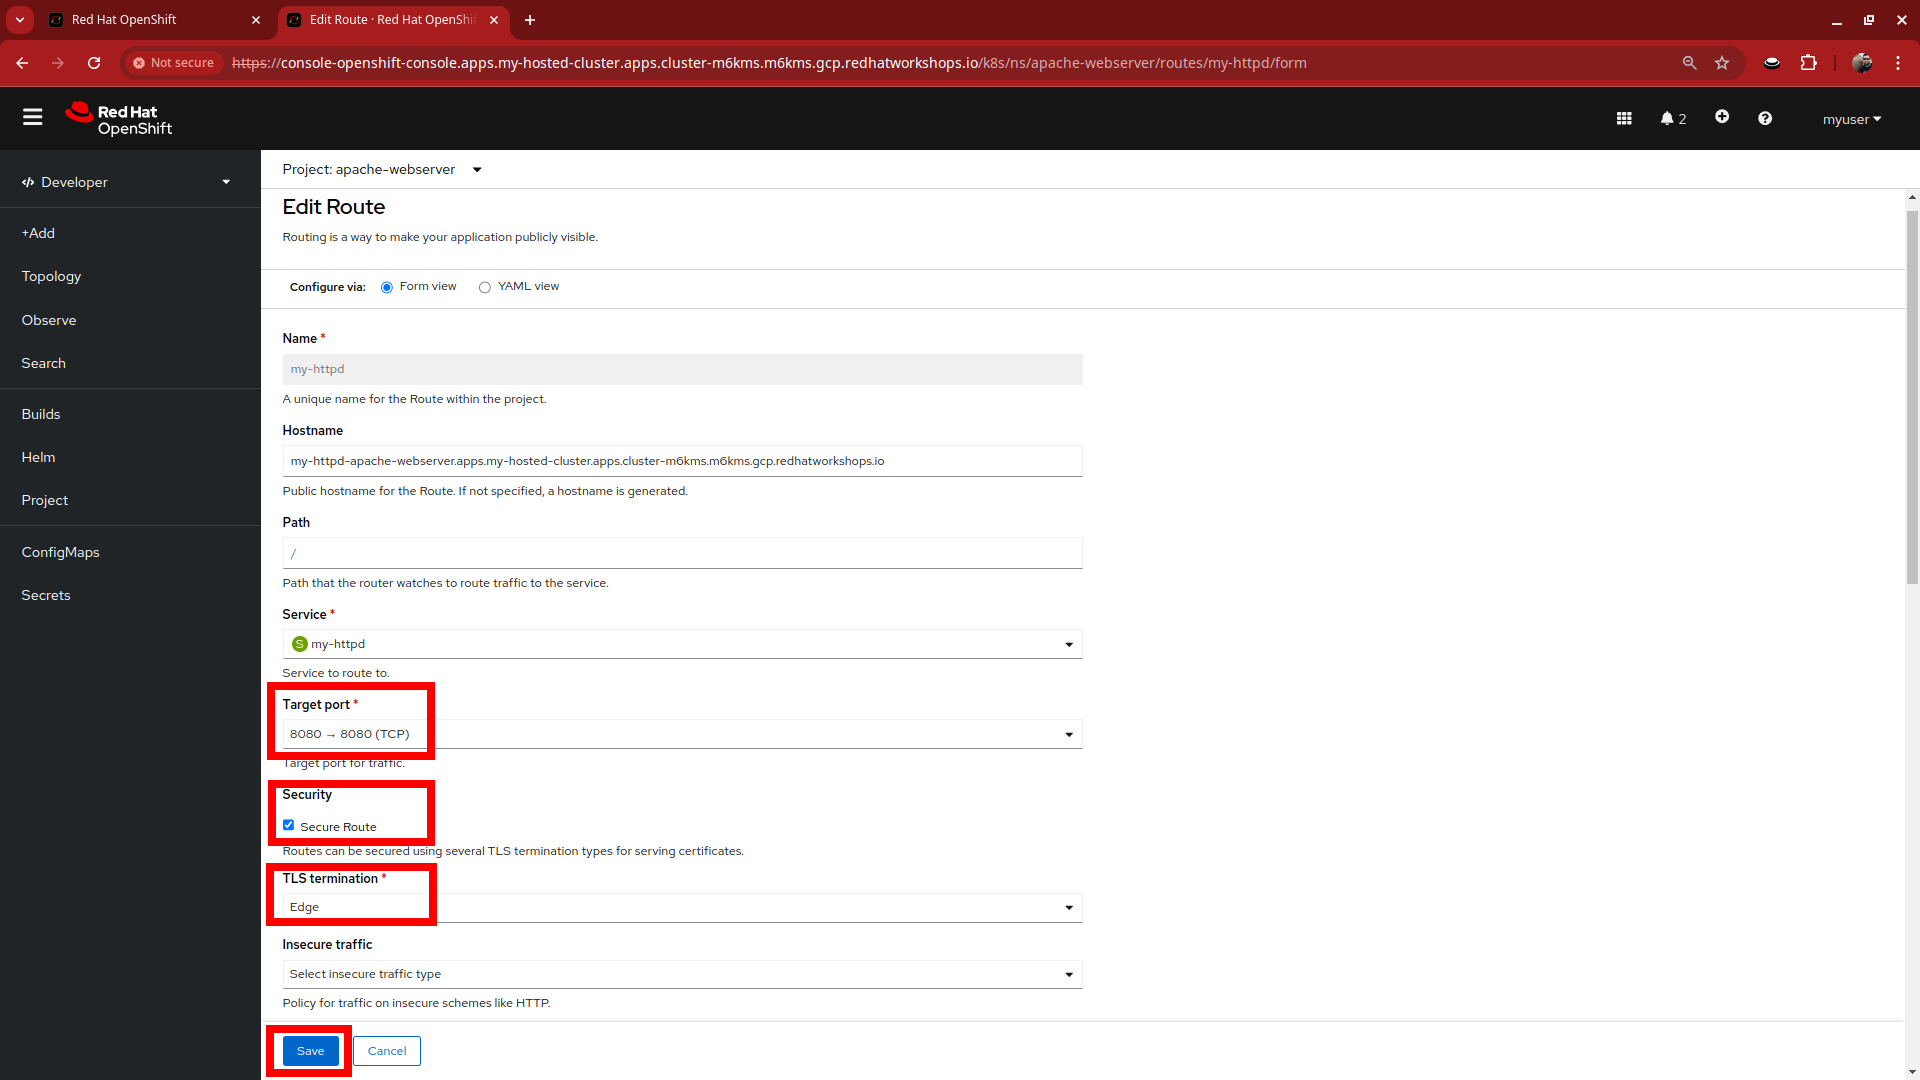
Ensure that the Target port value is set to 8080-→8080, and that the Secure Route box is checked, with TLS termination set to Edge. Click on the blue Save button.
-
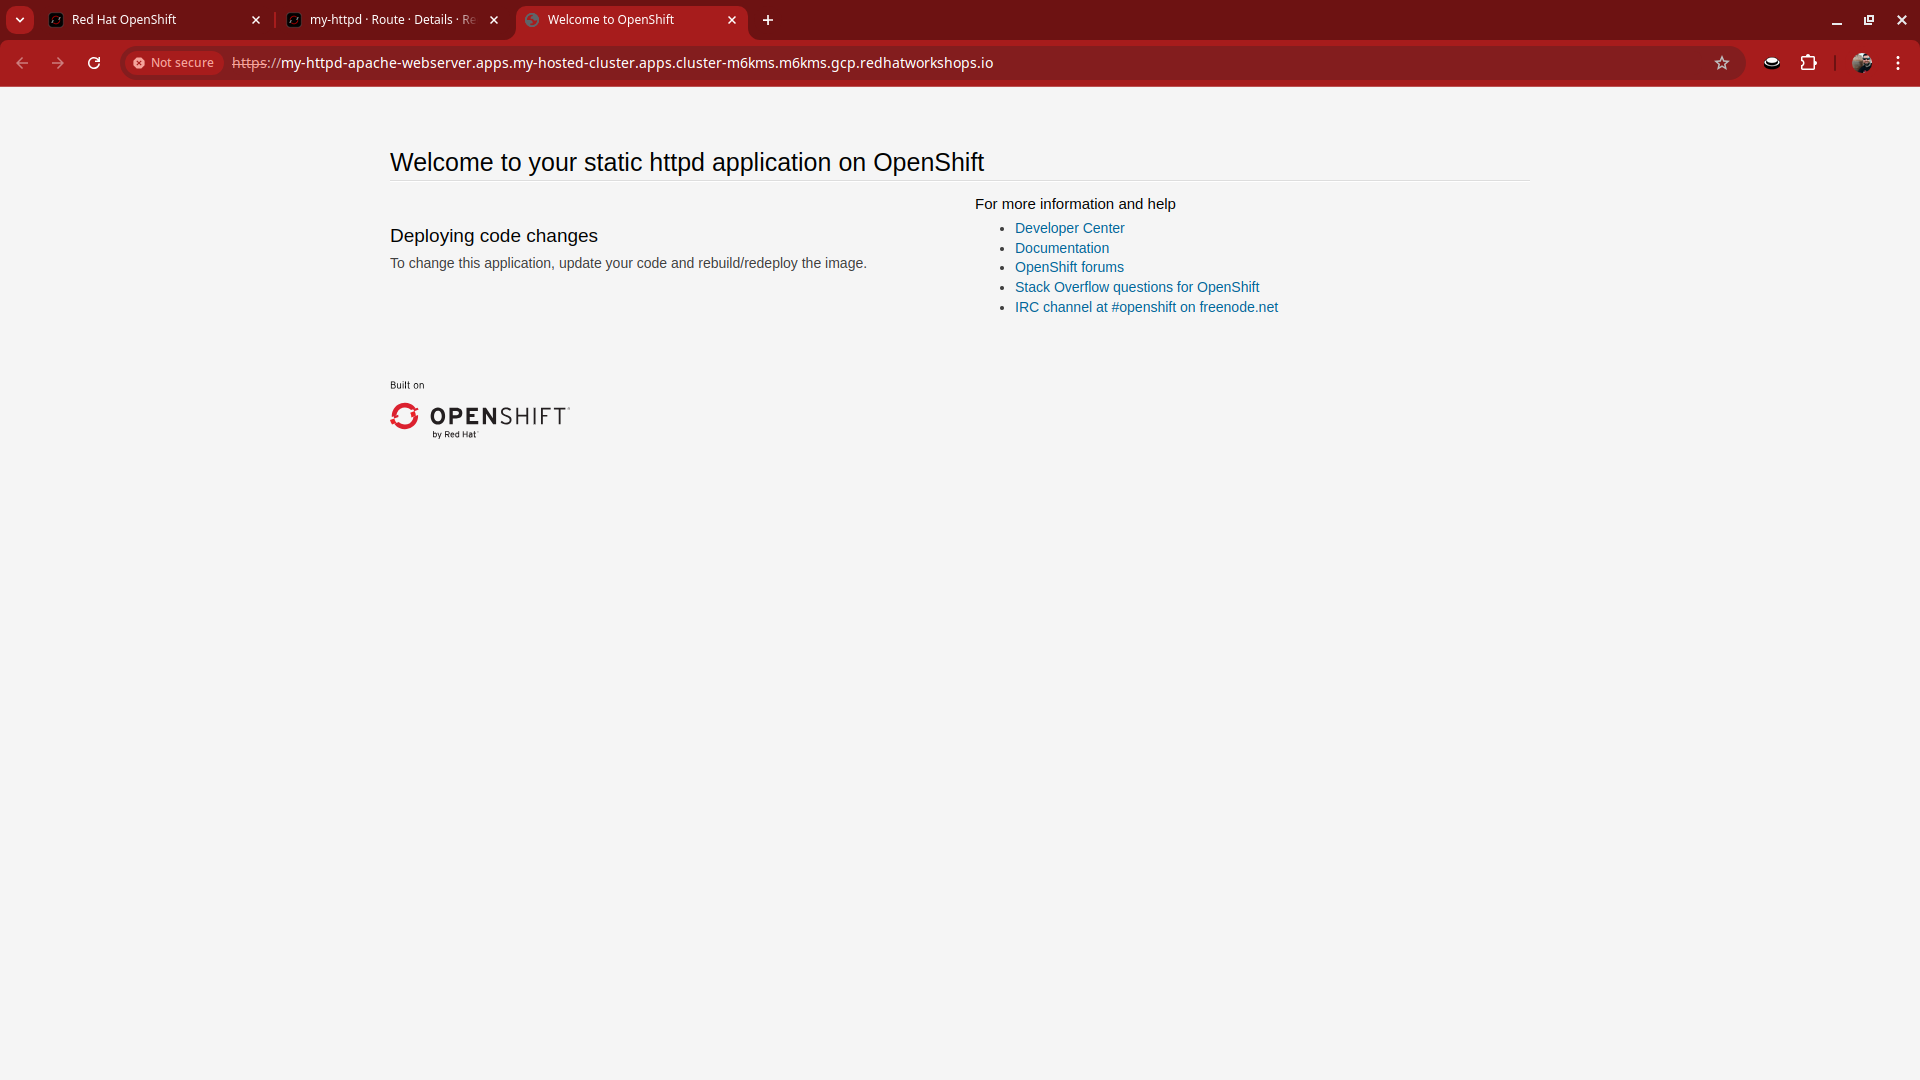
Back on the Route details page you can click the URL found under Location to display the Apache test page for our my-httpd app.
-
Close this tab when you are done with it.
Explore Autoscaling
Now that our application is deployed and running we are going to see autoscaling live in action, but first we have to enable it if it isn’t already.
-
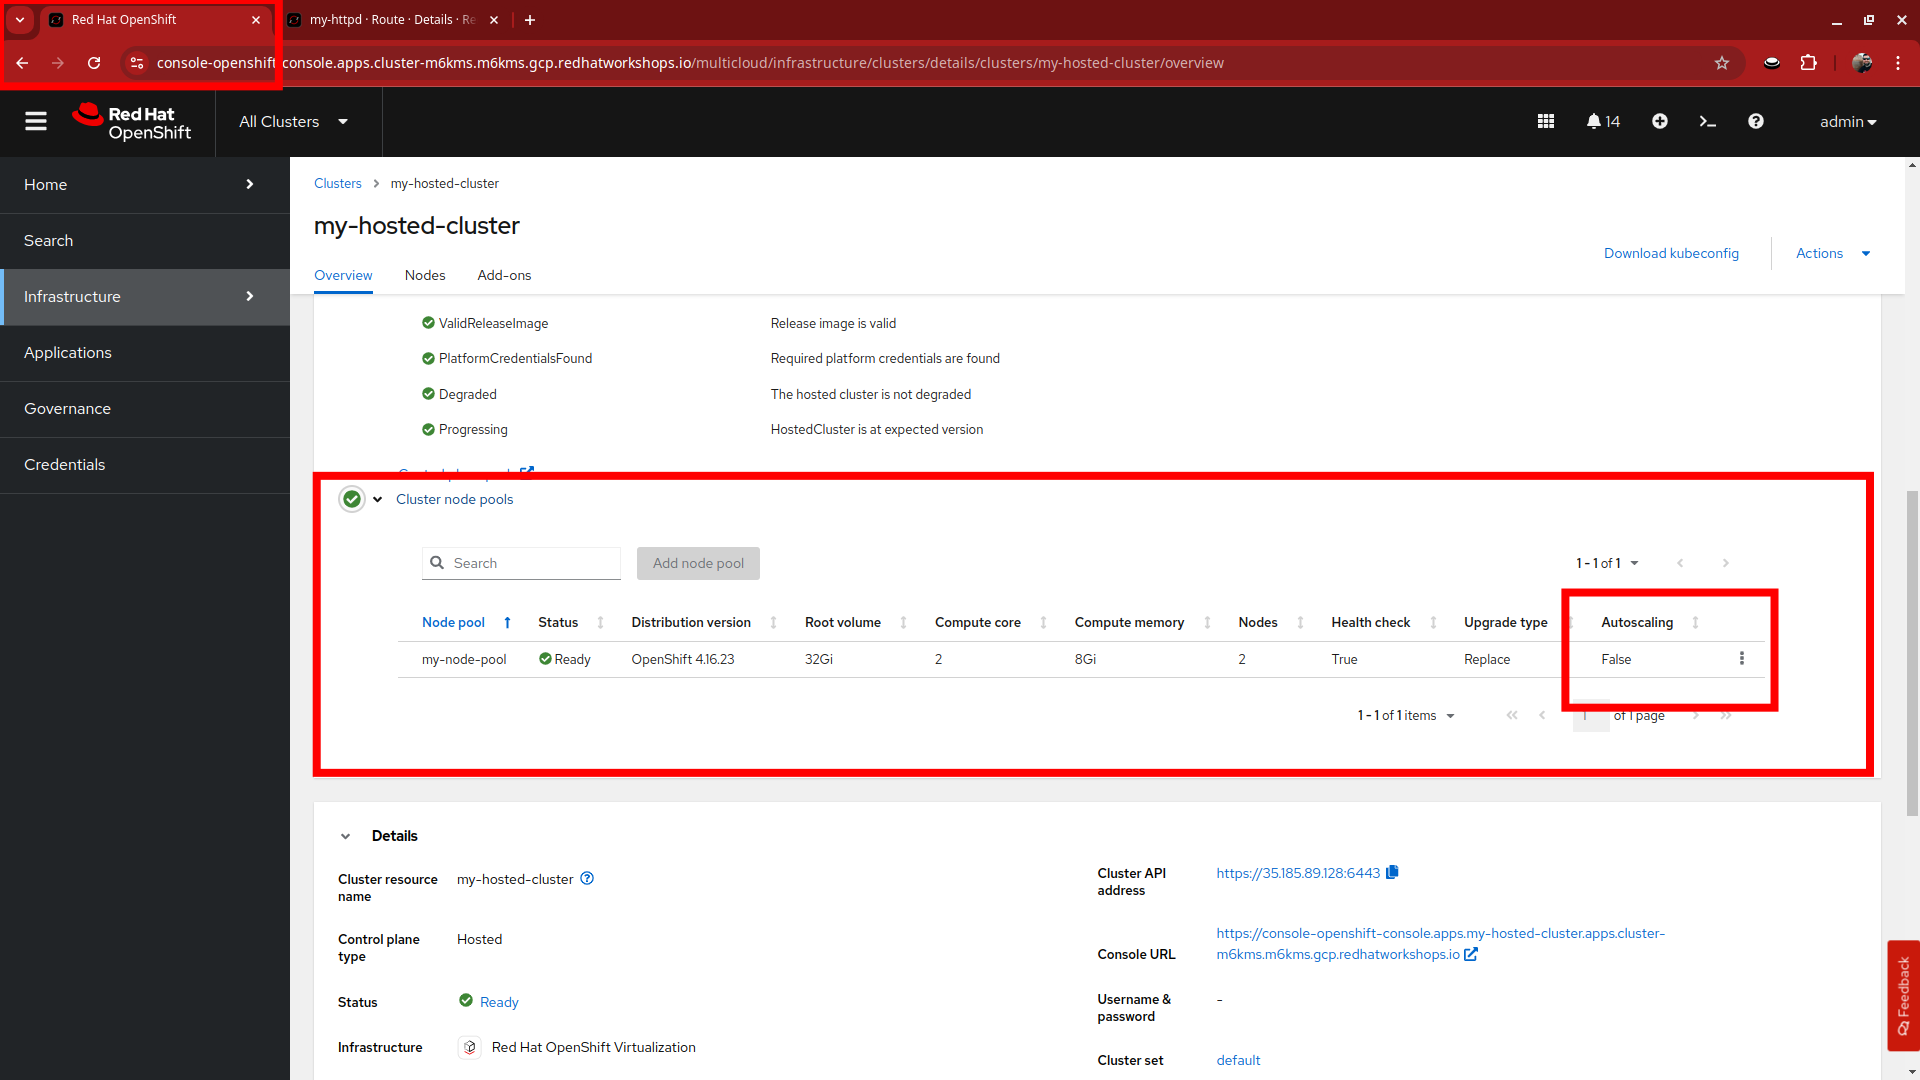
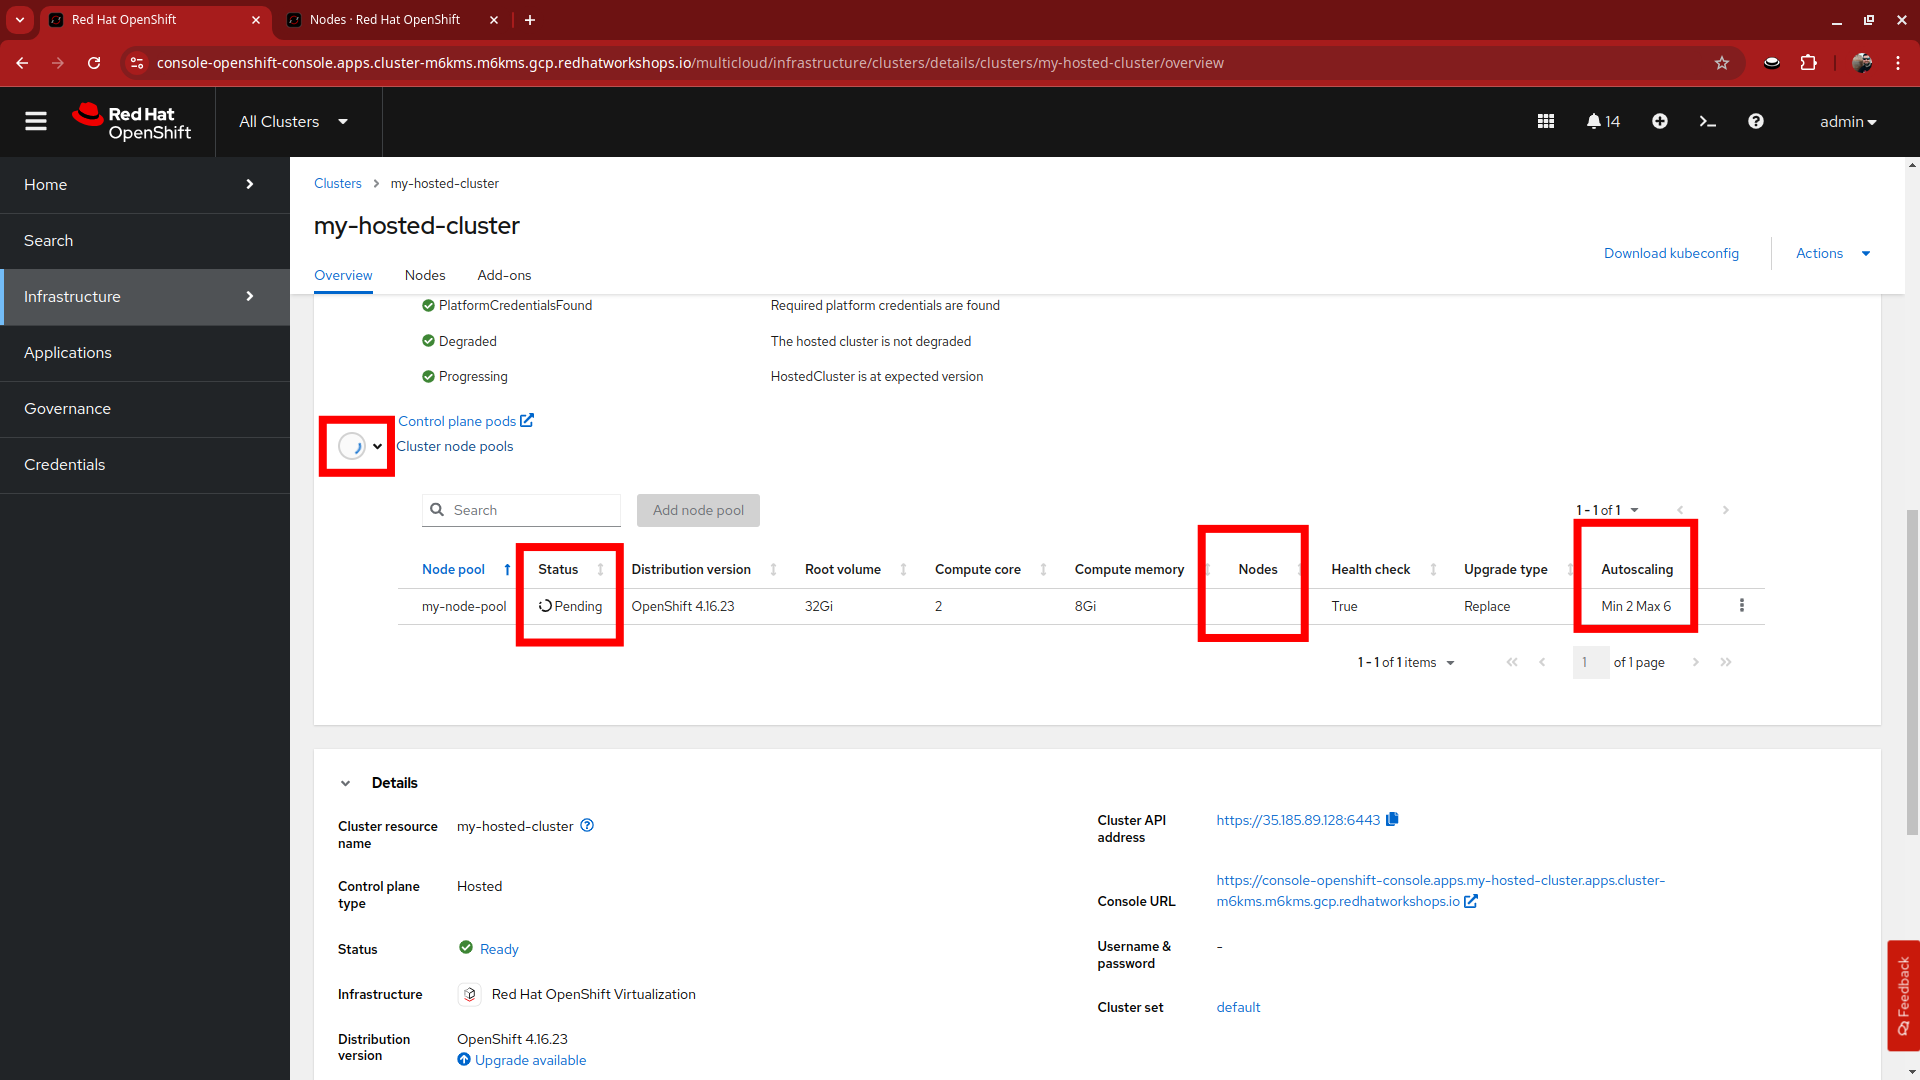
Click on the tab that takes us back to our hosting cluster and back up to the Cluster node pools section. We can see that there are still just 2 nodes in my-node-pool, but we can also see that Autoscaling is set to False
-
Return to the terminal at the right of your showroom and ssh to the bastion host once again if needed.
-
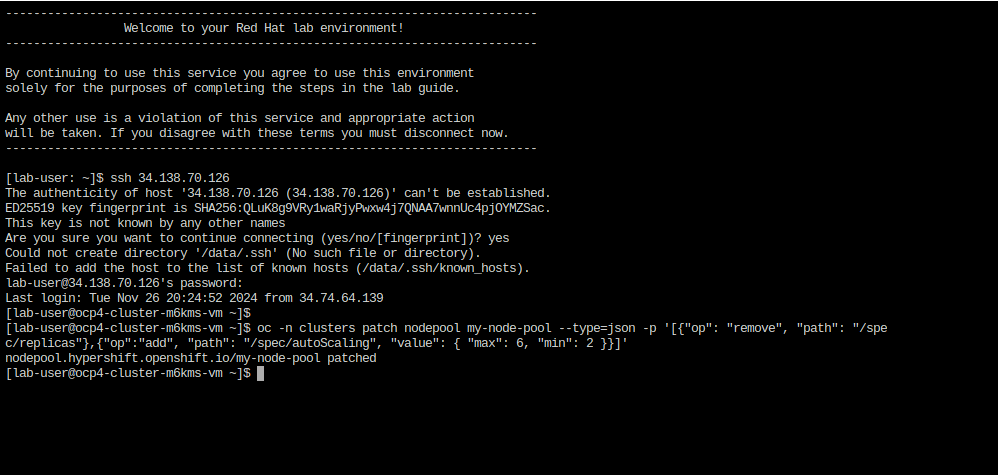
To enable Autoscaling for my-node-pool we must disable the static replica count and enable autoscaling. Copy and paste the following syntax, and press the enter key.
oc -n clusters patch nodepool my-node-pool --type=json -p '[{"op": "remove", "path": "/spec/replicas"},{"op":"add", "path": "/spec/autoScaling", "value": { "max": 6, "min": 2 }}]' -
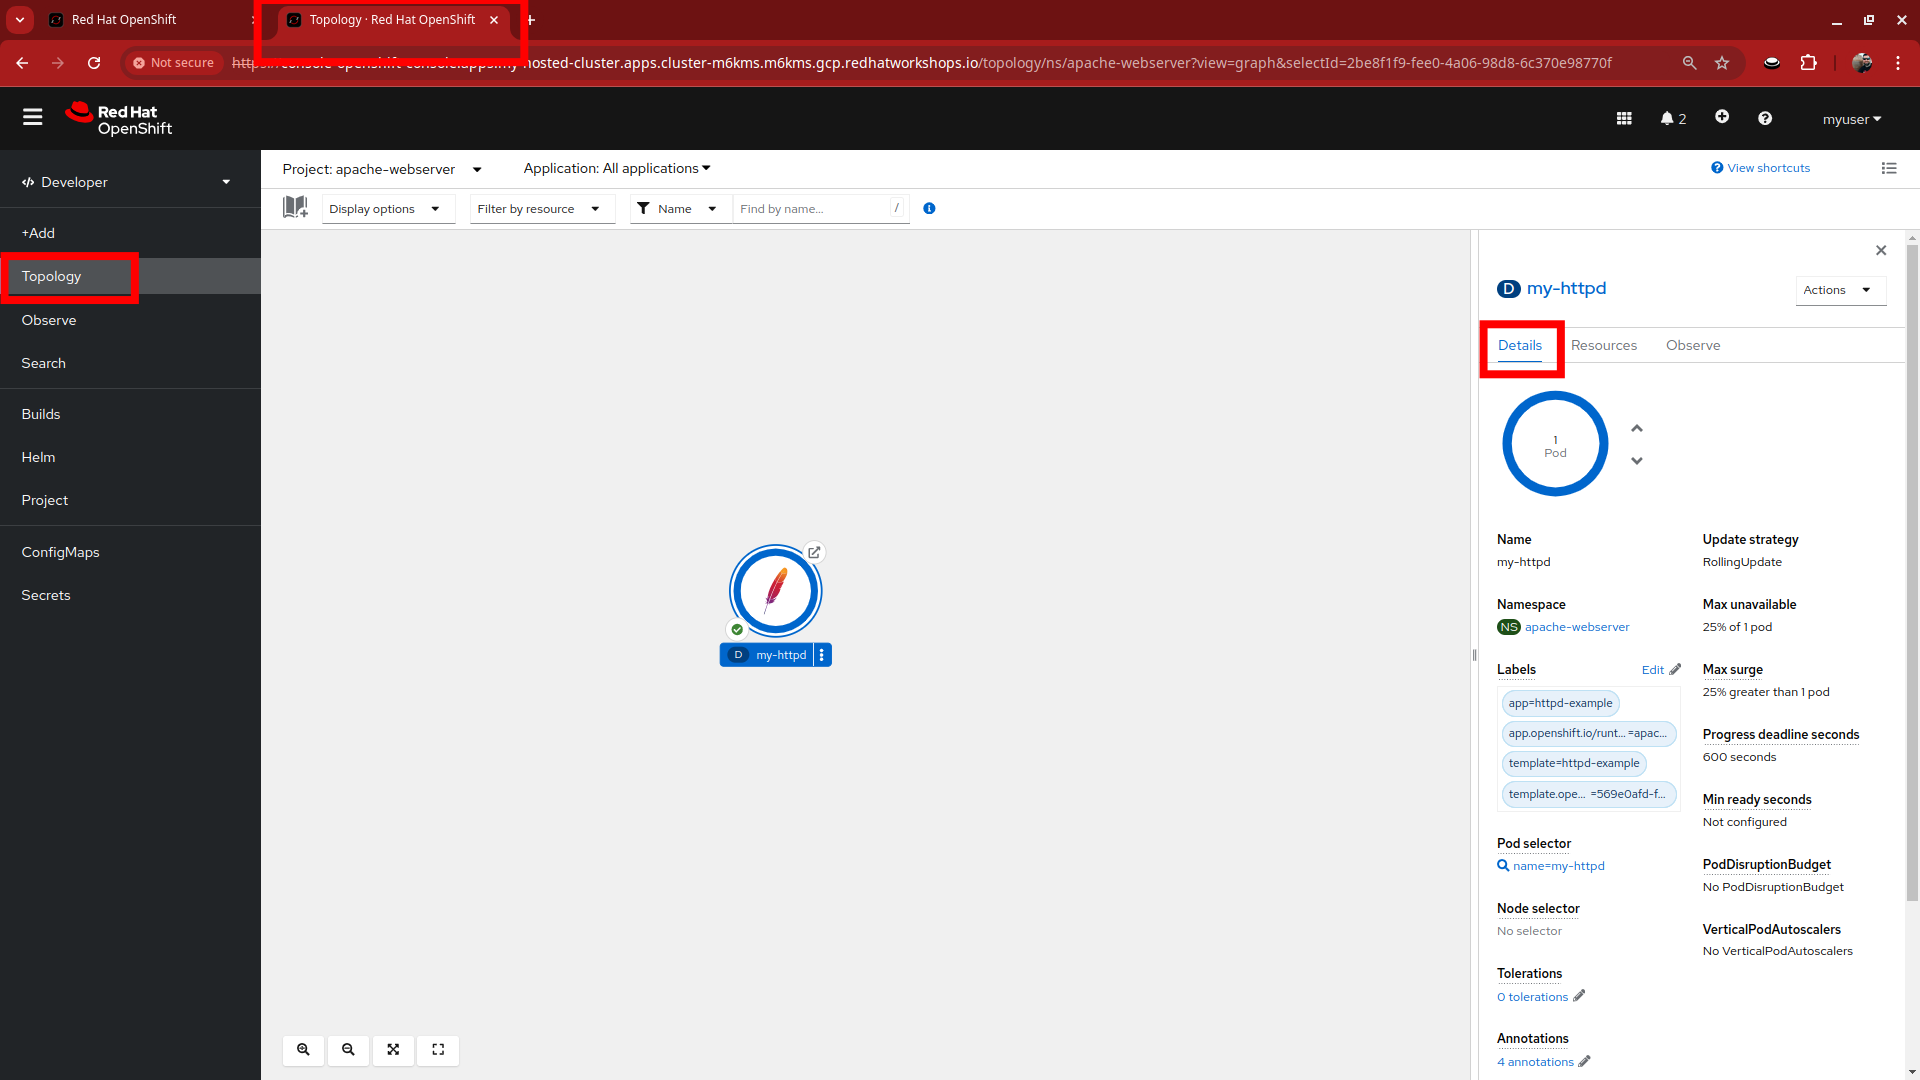
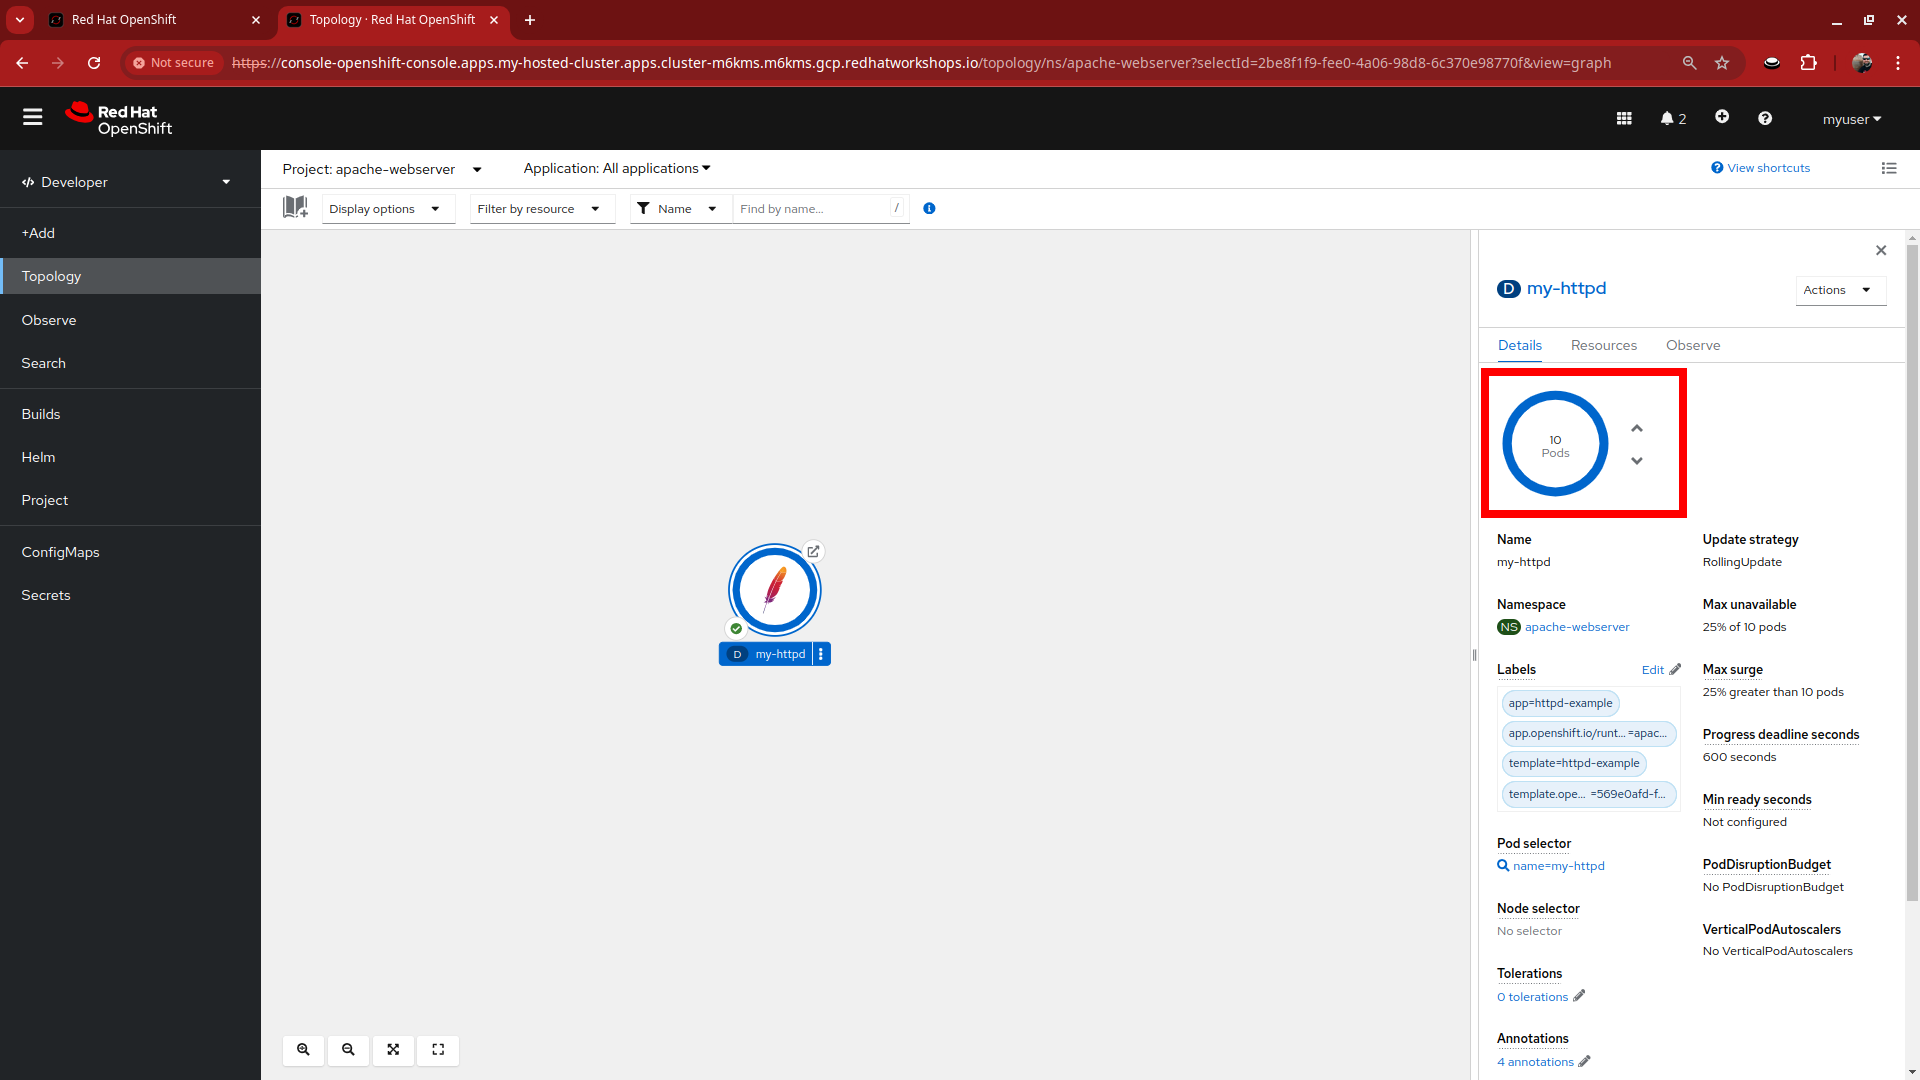
Return to the tab where our application is currently running, click on Topology to view the app, and click on Details on the right to view the pod details.
-
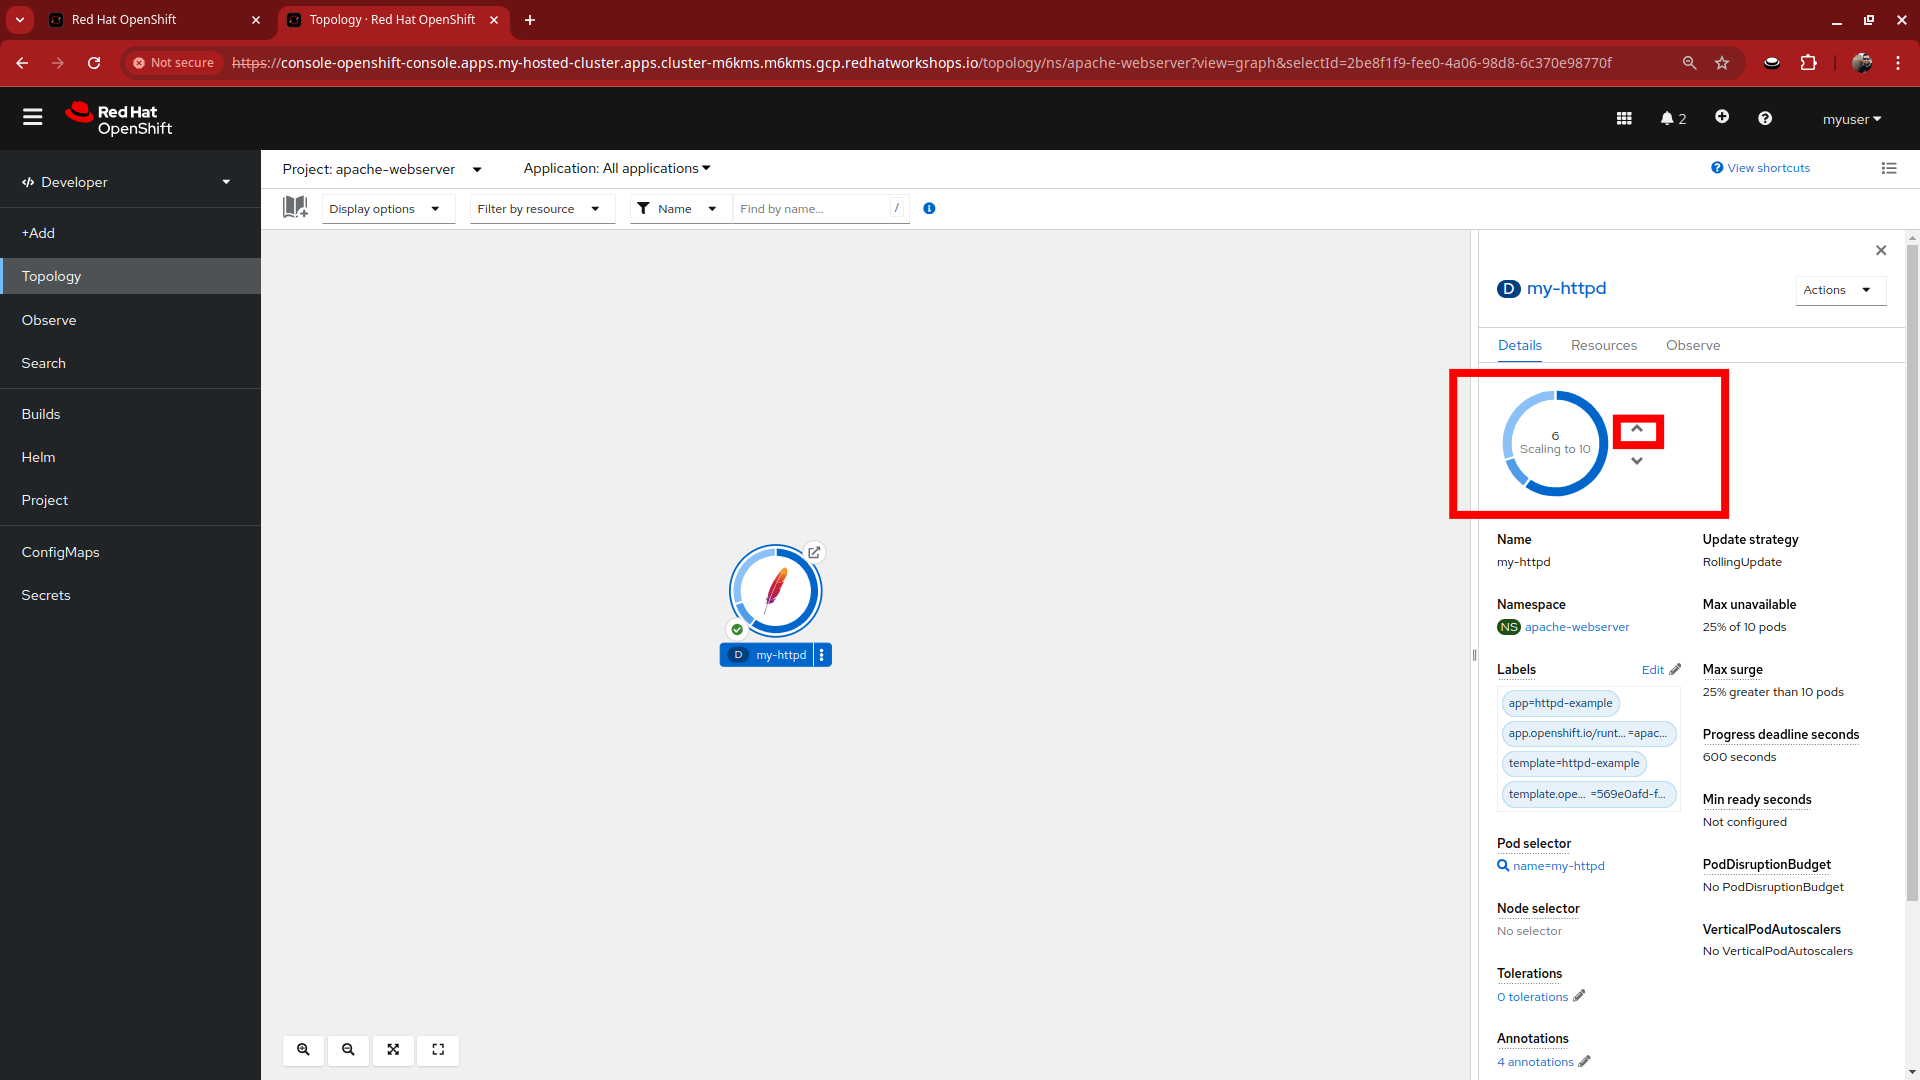
Using the toggle on the right side, we want to scale our application up to 10 instances to apply pressure to current cluster resources.
-
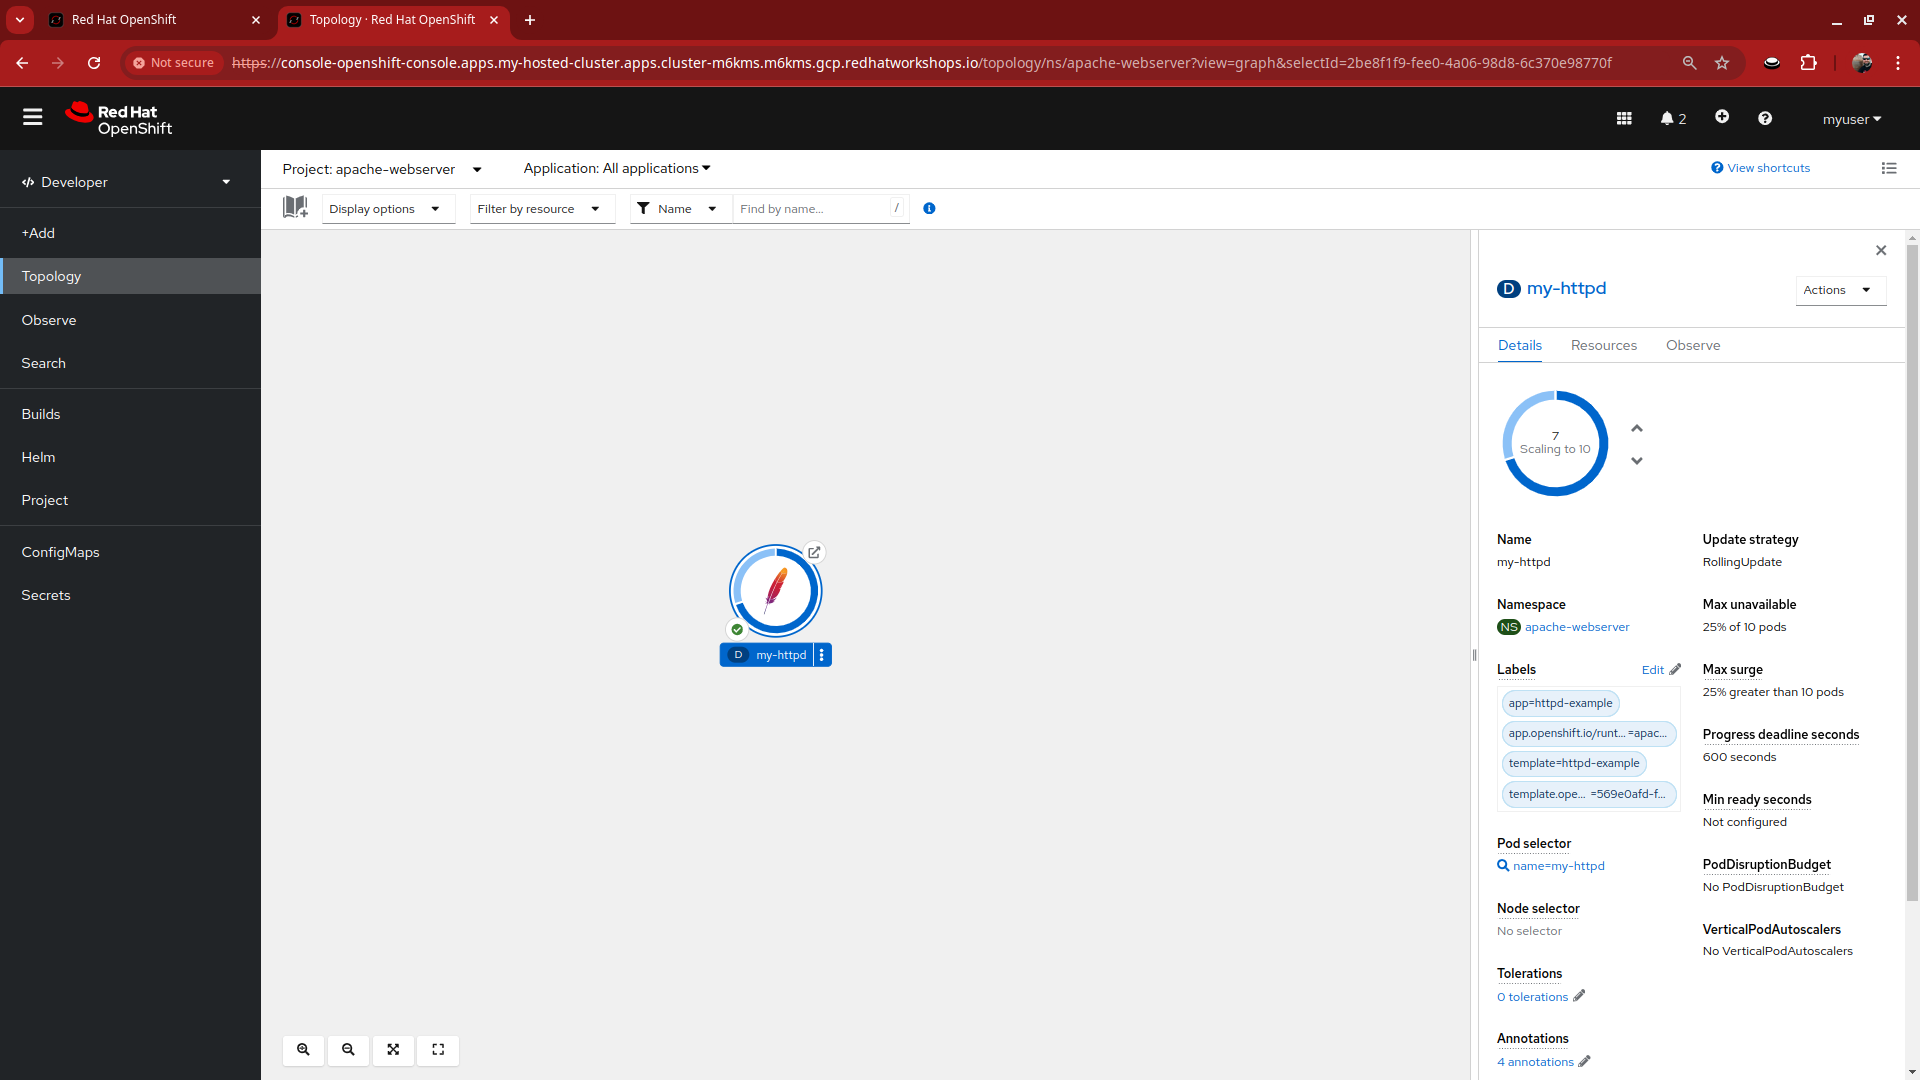
The application intially begins to scale quite quickly, but when it’s exhausted resources it stalls. In this case there are 7 running instances and 3 pending pods with no resources to be placed.
-
Return to the tab that shows the information for the hosting cluster, and we should see the size of the node pool begin to dynamically update.
-
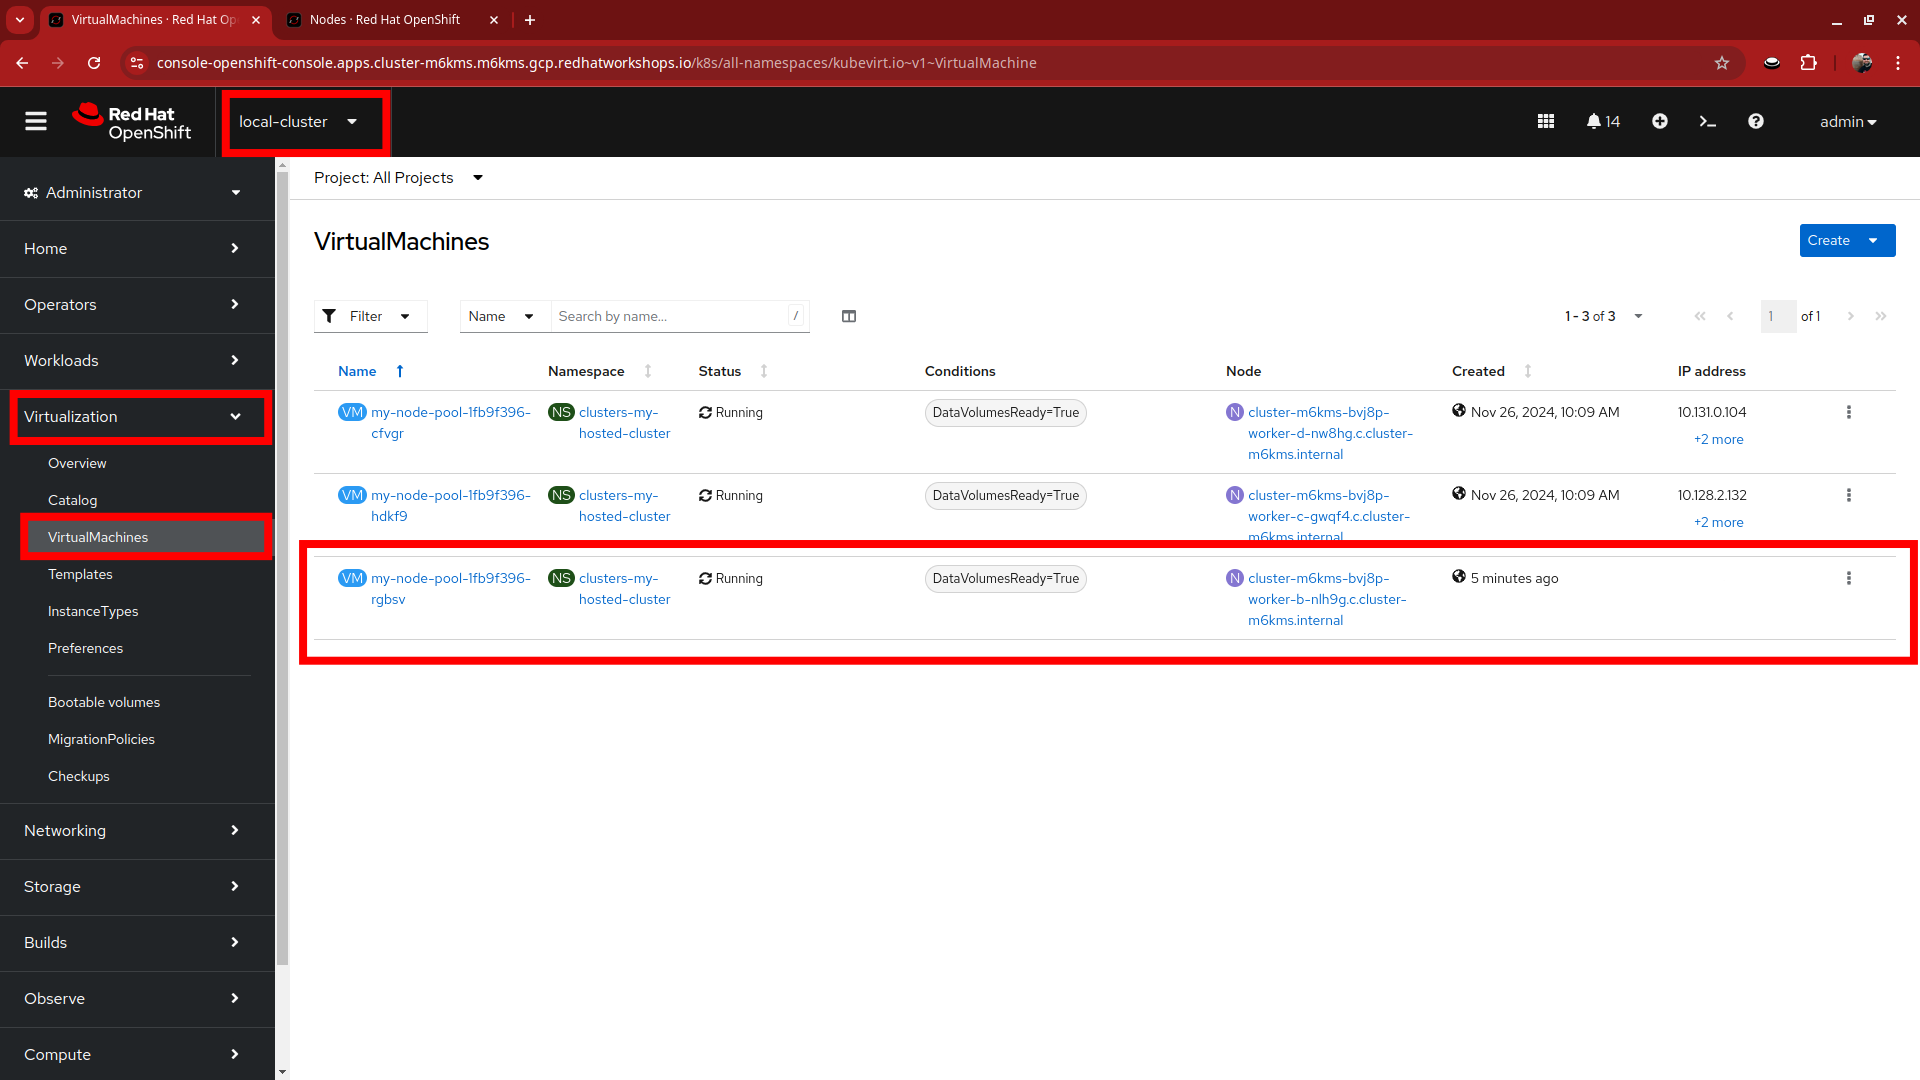
While we are waiting for the autoscale action to complete, which can take about 10 minutes, you can visit the local-cluster and click on left-side menu for Virtualization and VirtualMachines to see the newly added third machine.
-
Returning to the All Clusters window and reviewing the my-node-pool we can see that it has completed it’s update, and it’s status is Ready.
-
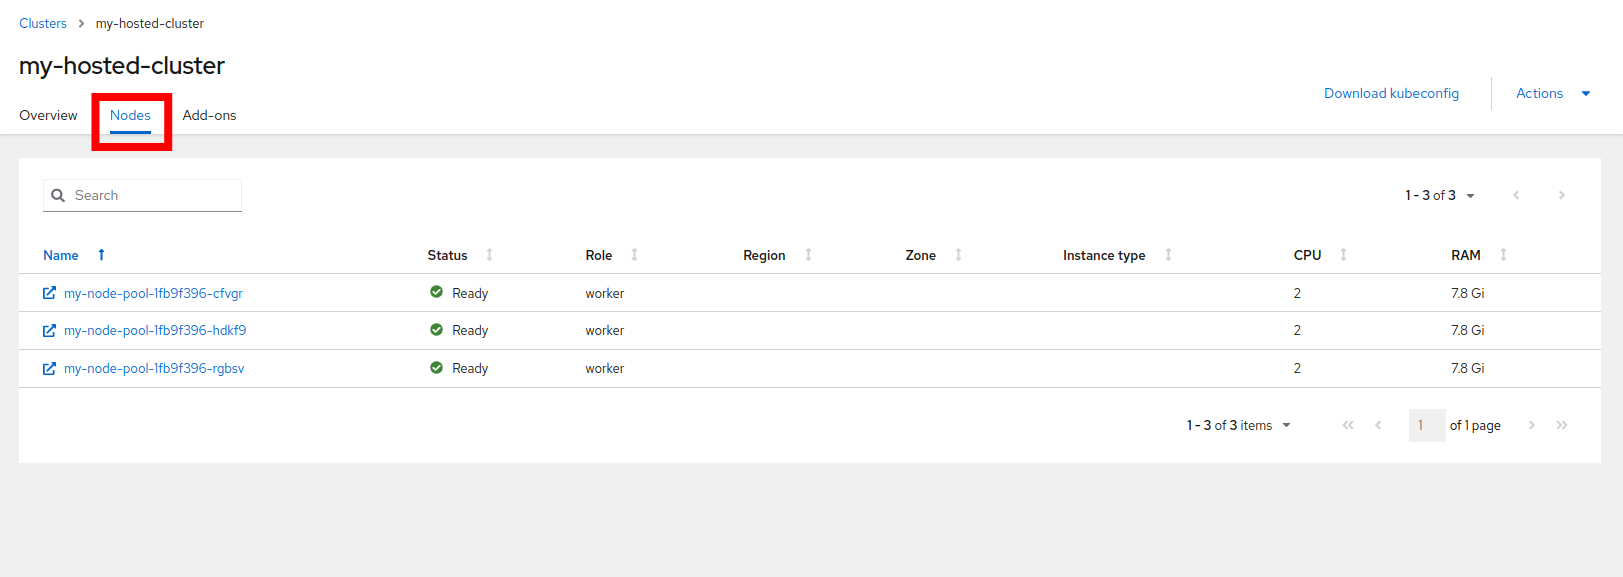
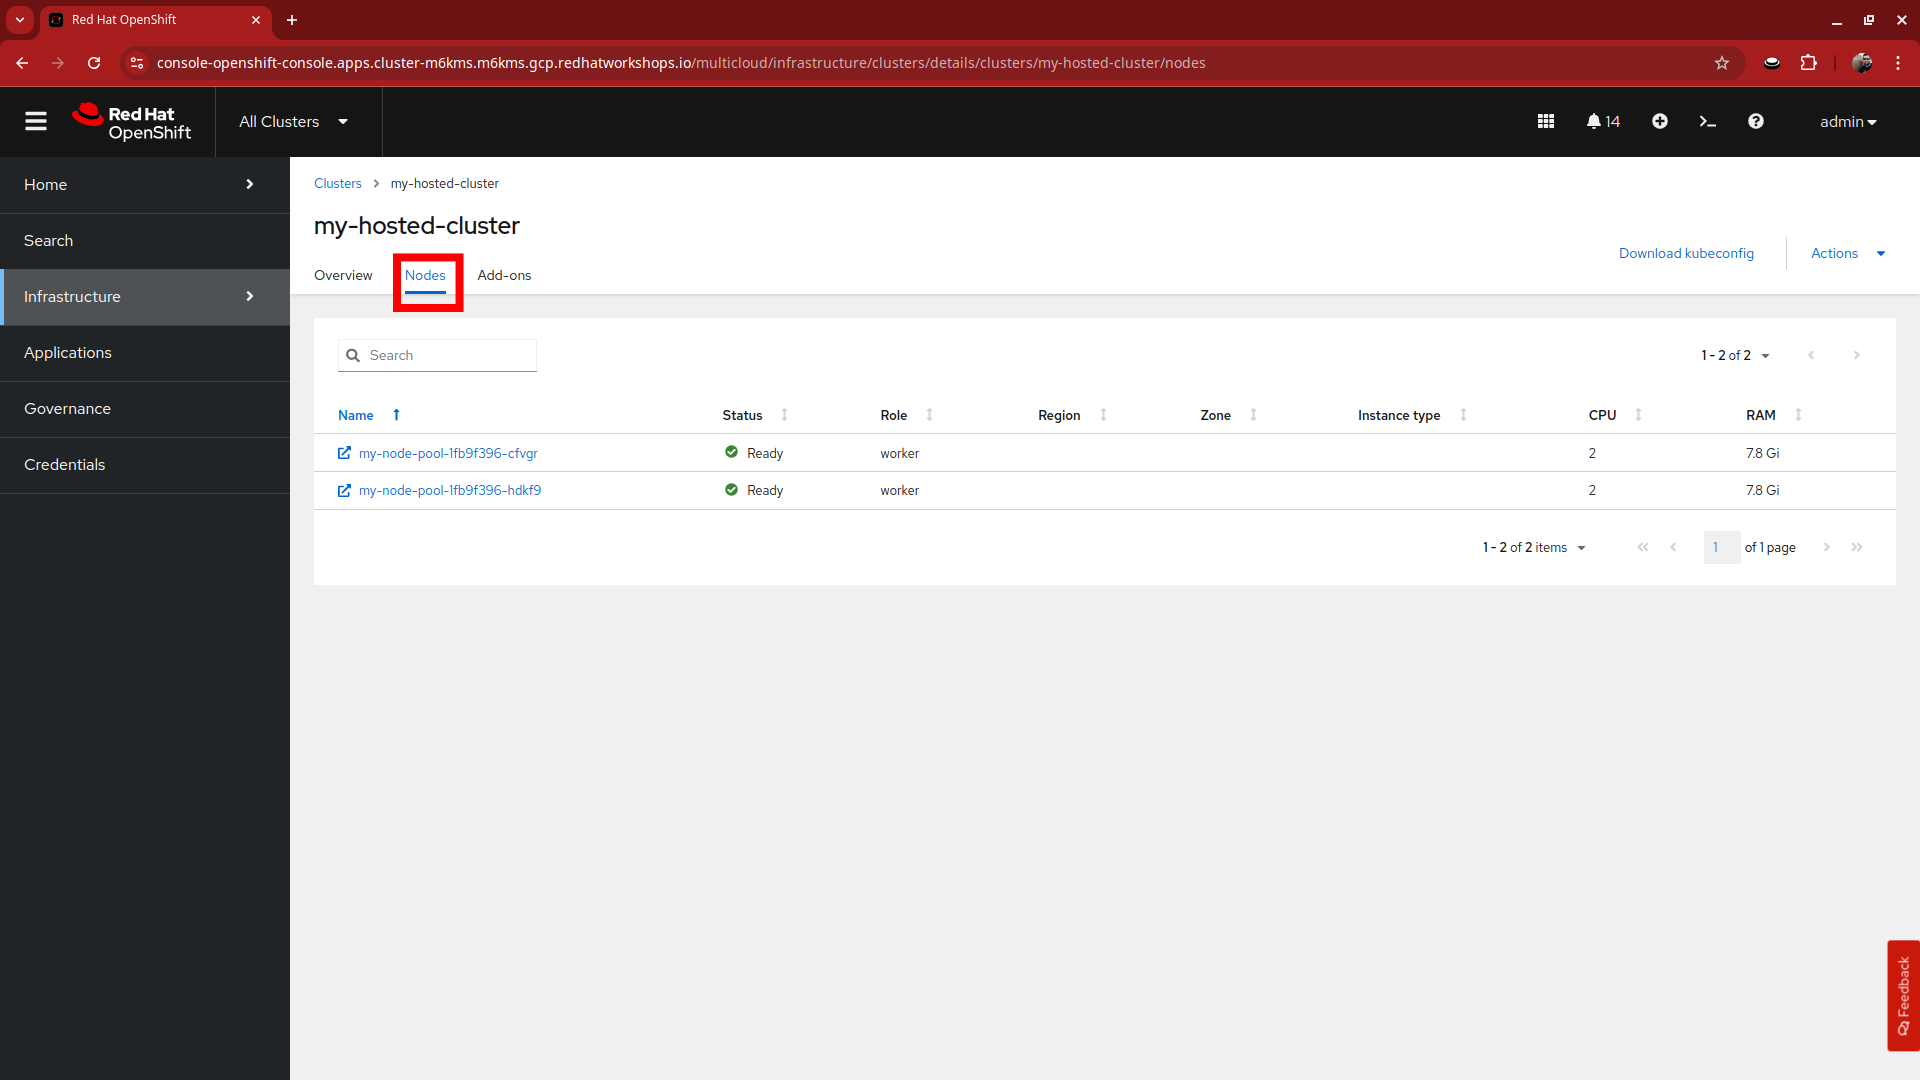
Click on the Nodes tab at the top to see the Three nodes that make up our node pool now.
-
Now click on the tab to our hosted cluster and lets check on our my-httpd application and it’s pending replicas. Since we have successfully autoscaled the cluster, the pending pods should now have found homes and completed the scale up to 10 instances.
Delete the Application and Scale Down the Cluster
Once the additional resources are no longer needed to support the application, the the number of nodes in the hosted cluster can dynamically scale back down to free up resources in the hosting cluster. Lets try that now.
-
First lets clean up our application and free up those resources.
-
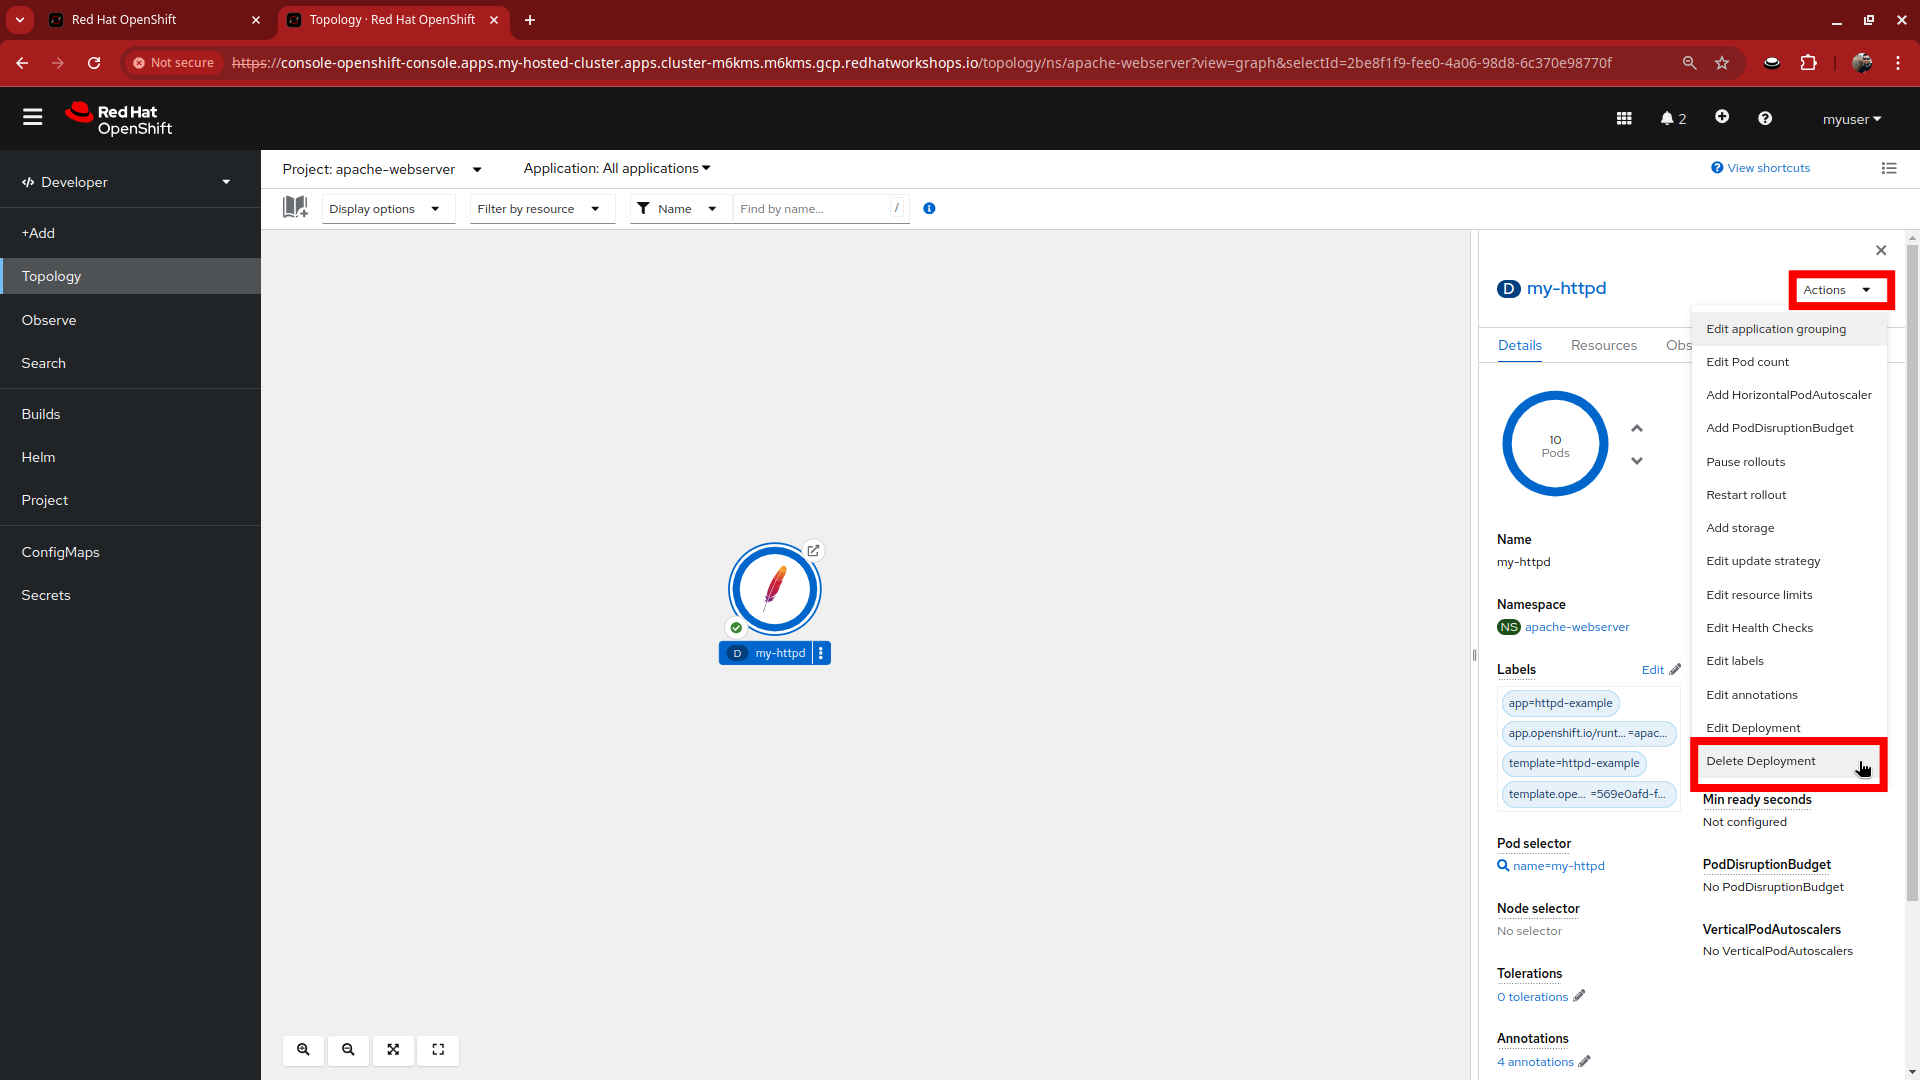
Select the Actions menu from our application details, and from the drop-down menu select Delete Deployment.
-
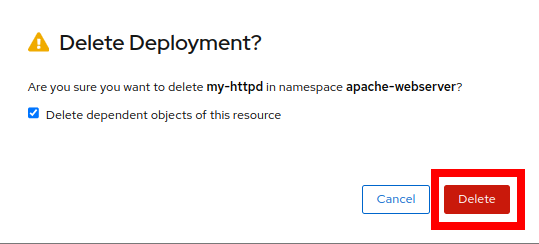
You will be asked to confirm deleting the the my-httpd application and all dependent objects. Click the red Delete button.
-
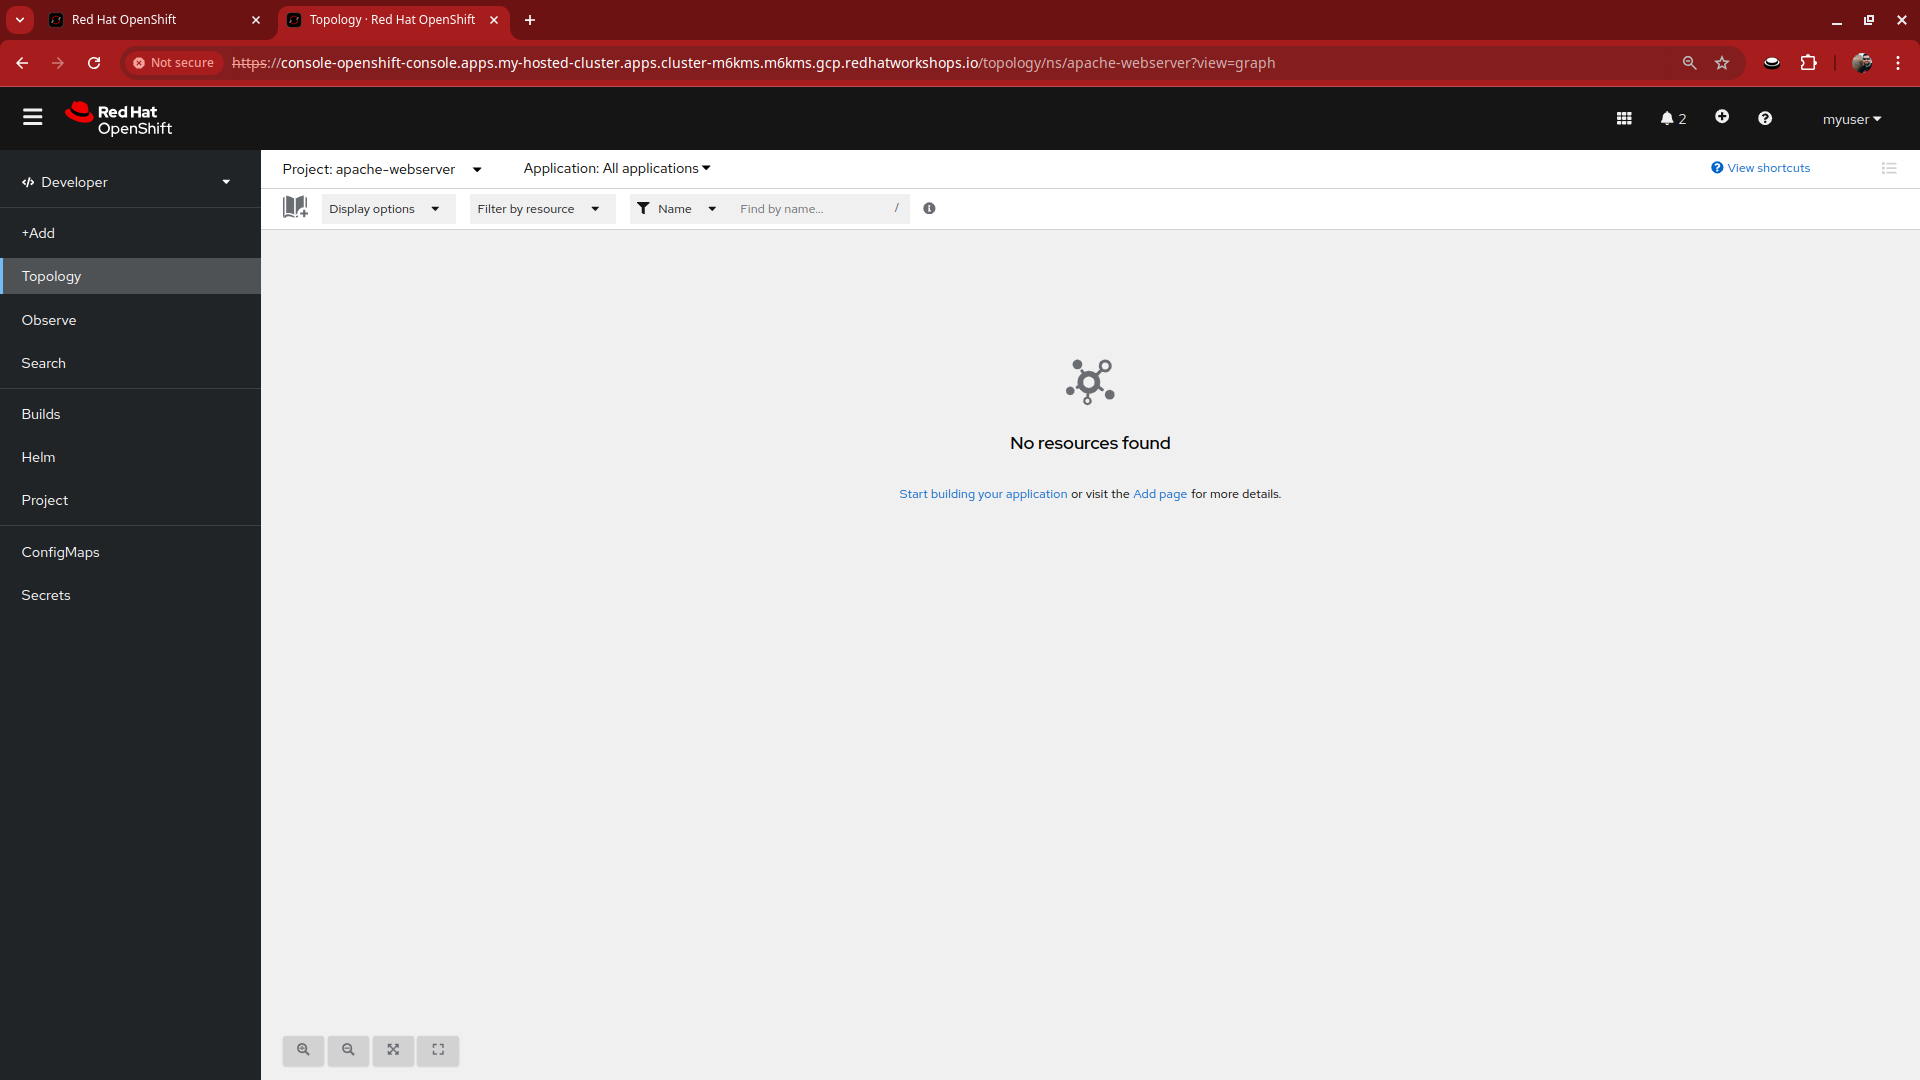
When the application is deleted you will see a page that shows No resources found.
-
Close the tab that shows the console of my-hosted-cluster and return to the cluster overview for the hosting cluster.
-
Click on the Nodes tab at the top of the screen to see that there are still three nodes available.
-
Wait patiently for the nodes to scale down (approximately 10 minutes) and then check again.
|
Manually scaling the NodePool
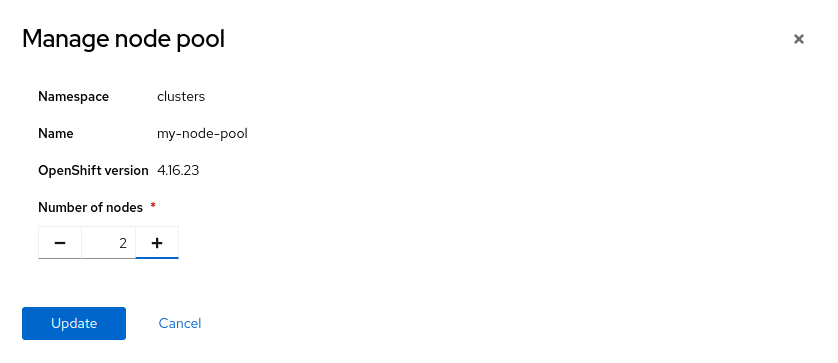
When autoscaling is enabled you will lose the ability to scale worker nodes manually. However, if your cluster had not been configured autoscaling, then it is perfectly acceptable to manually scale it up to 3 and back down to 2 nodes to provide the resources you need. Follow these next steps to perform that action if necessary. |
Summary
In this section we learned about one of the major benefits of hosted control planes and NodePools which is the ability to autoscale up and down on demand when an application requests more resources than are currently available in the cluster, or when an application is deleted and frees up those resources.
